Sunday, August 1, 2021

Making a Leather Feather


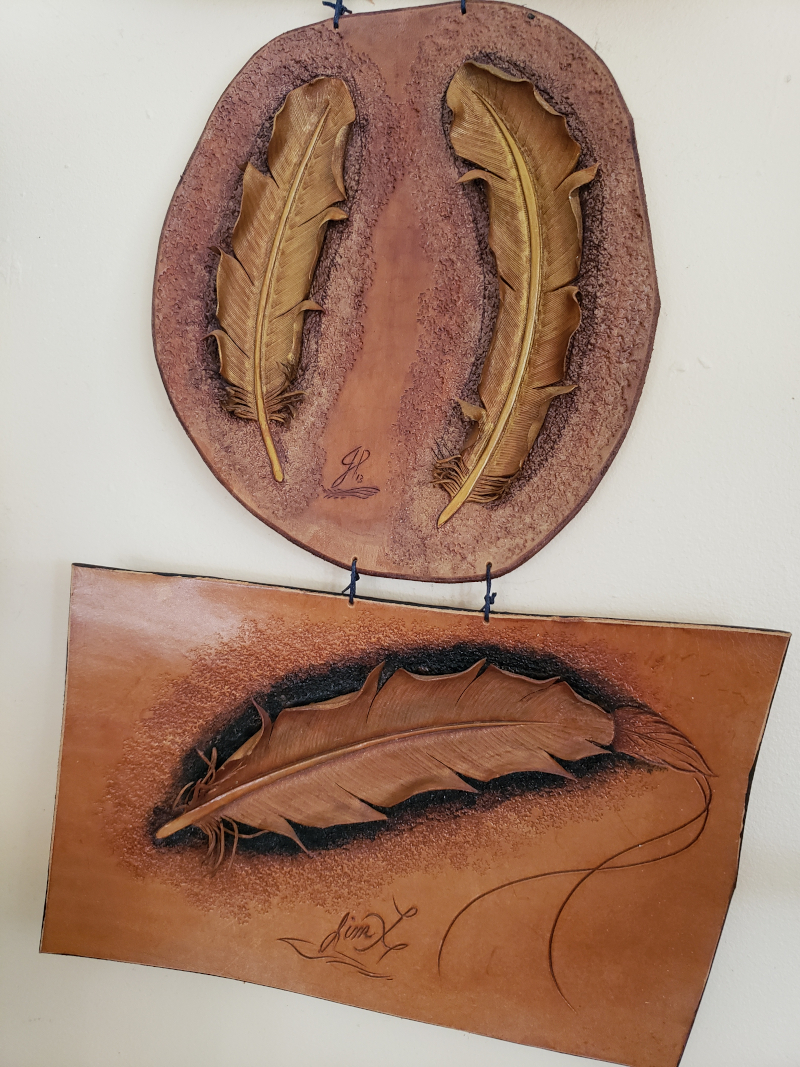
 The first time I learnt to make a leather feather like this, was in a class I attended - the master, Jim Linnell, was the instructor.
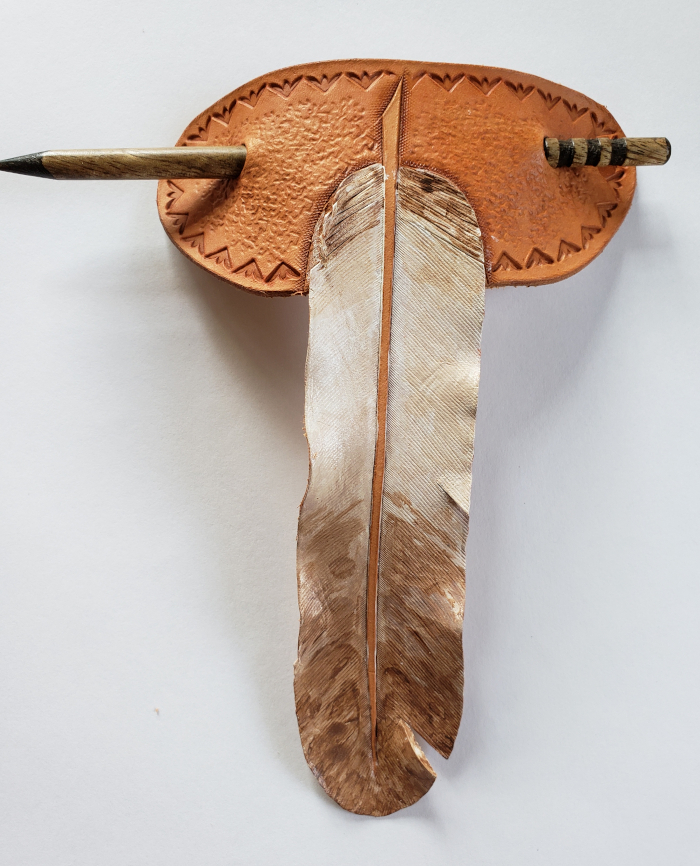
It was 2013 and I was fortunate enough to get the feather Jim made during the class - picture above.
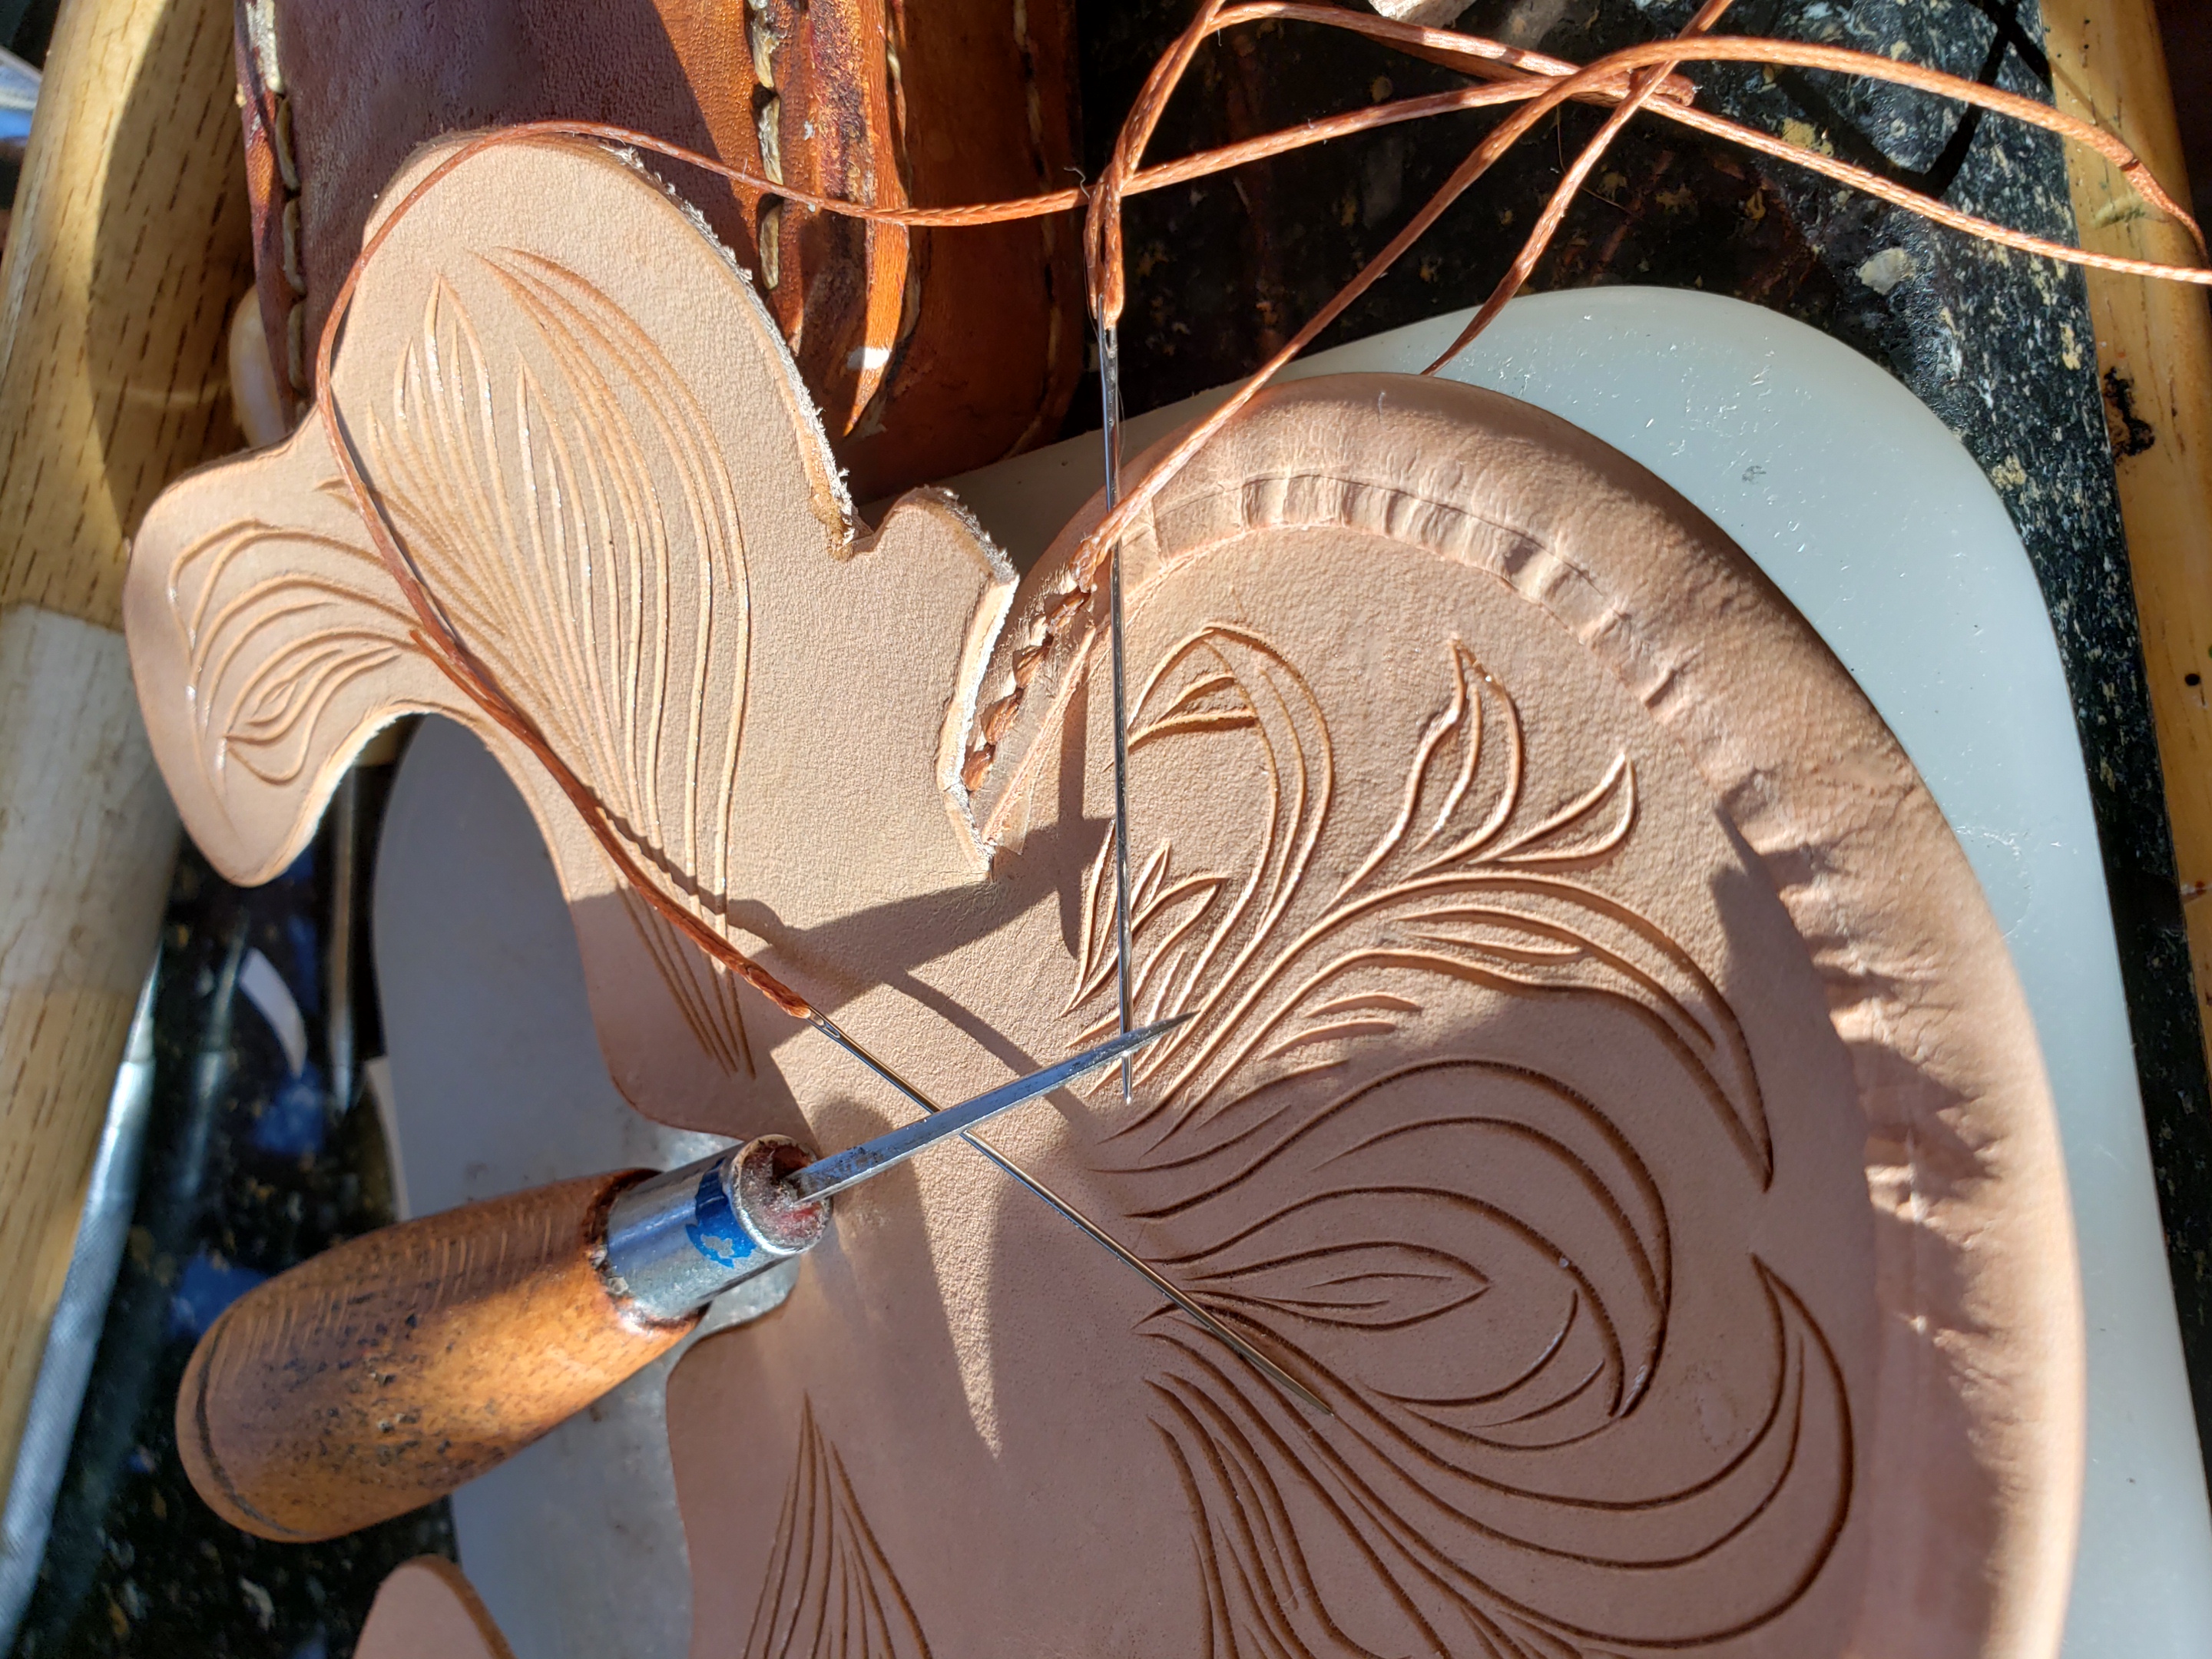
These feathers were not cut free from the leather, but remained as a 3D "tooling".
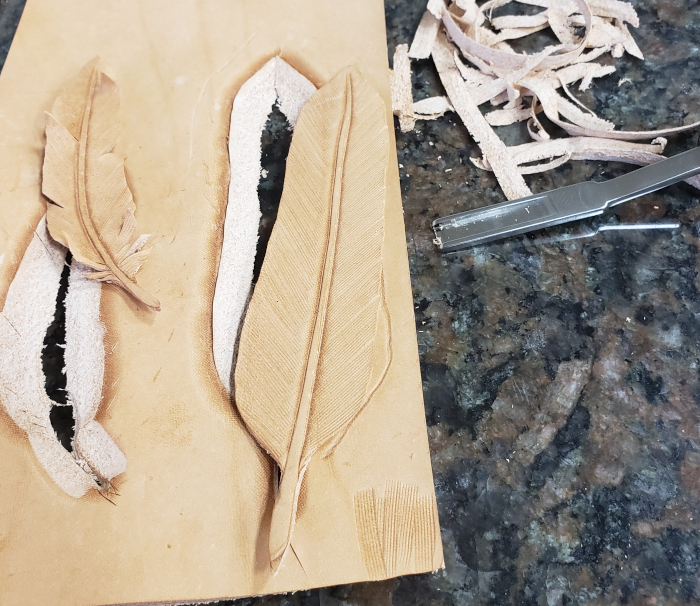
The videos I am going to show here, shows you how to make a feather that is cut loose from the leather.

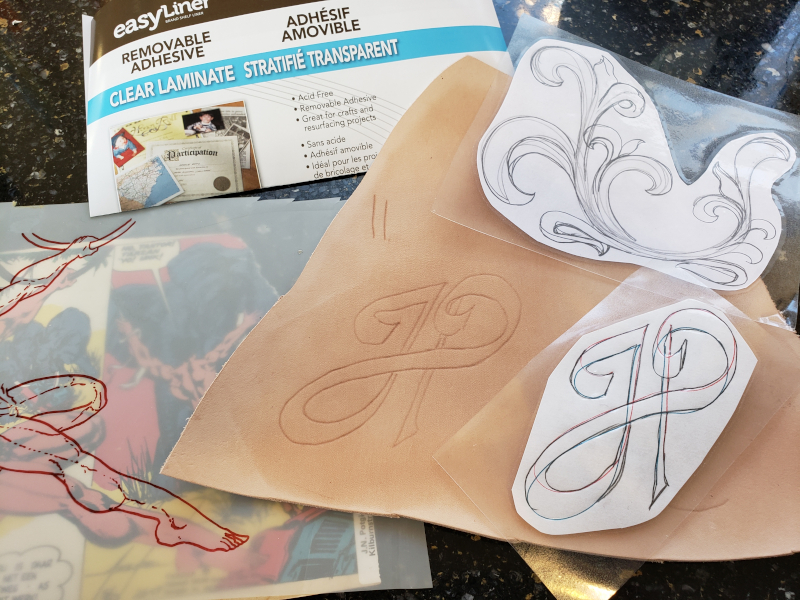
To start, I use a 2/3oz vegtan leather, a swivel knife, a hair-blade tool, a wide fine-textured beveler, a very sharp Exacto blade (or you can use a fresh scalpel blade).


After cutting it free from the leather, the only steps that remain, is to thin down the ridges that will be on the back, sculpt it a little and then turn them into whatever color you desire.


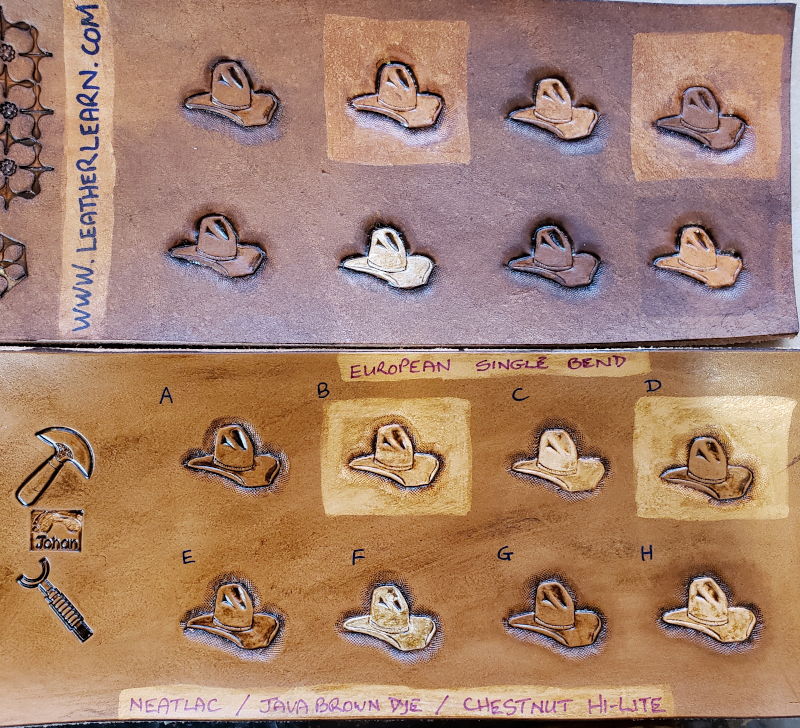
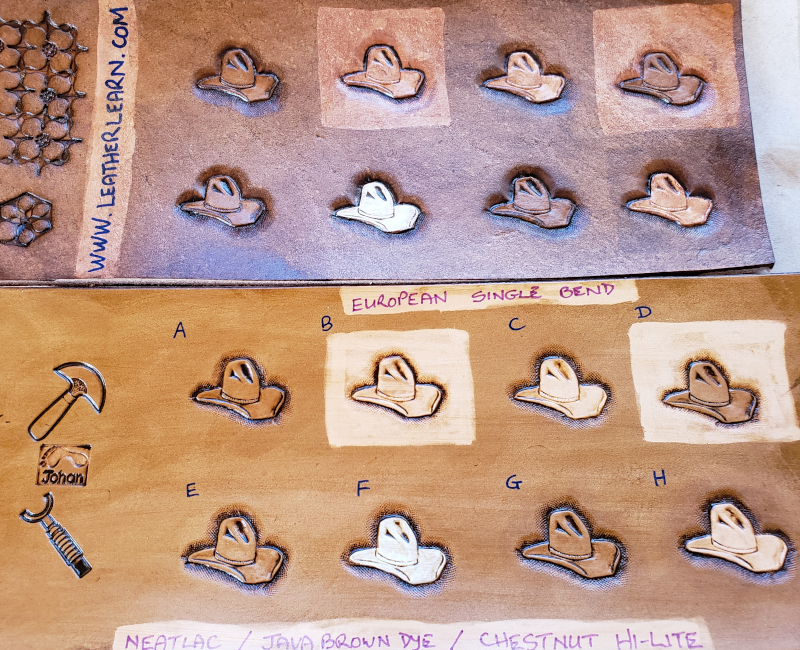
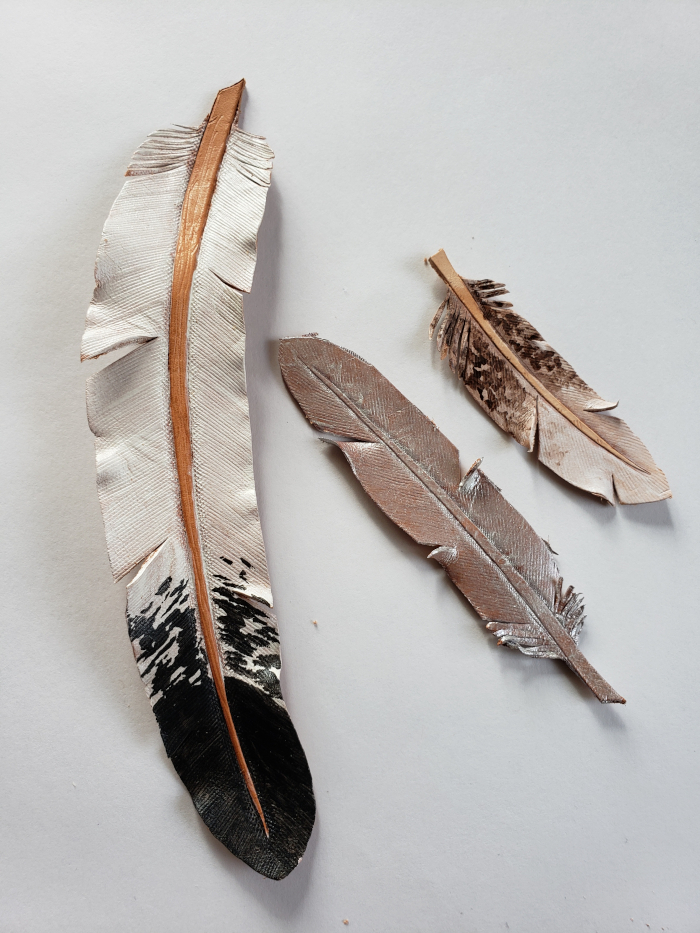
There are so many variations you can play with when making these feathers:  the color, the shape, the size, realistic or not.


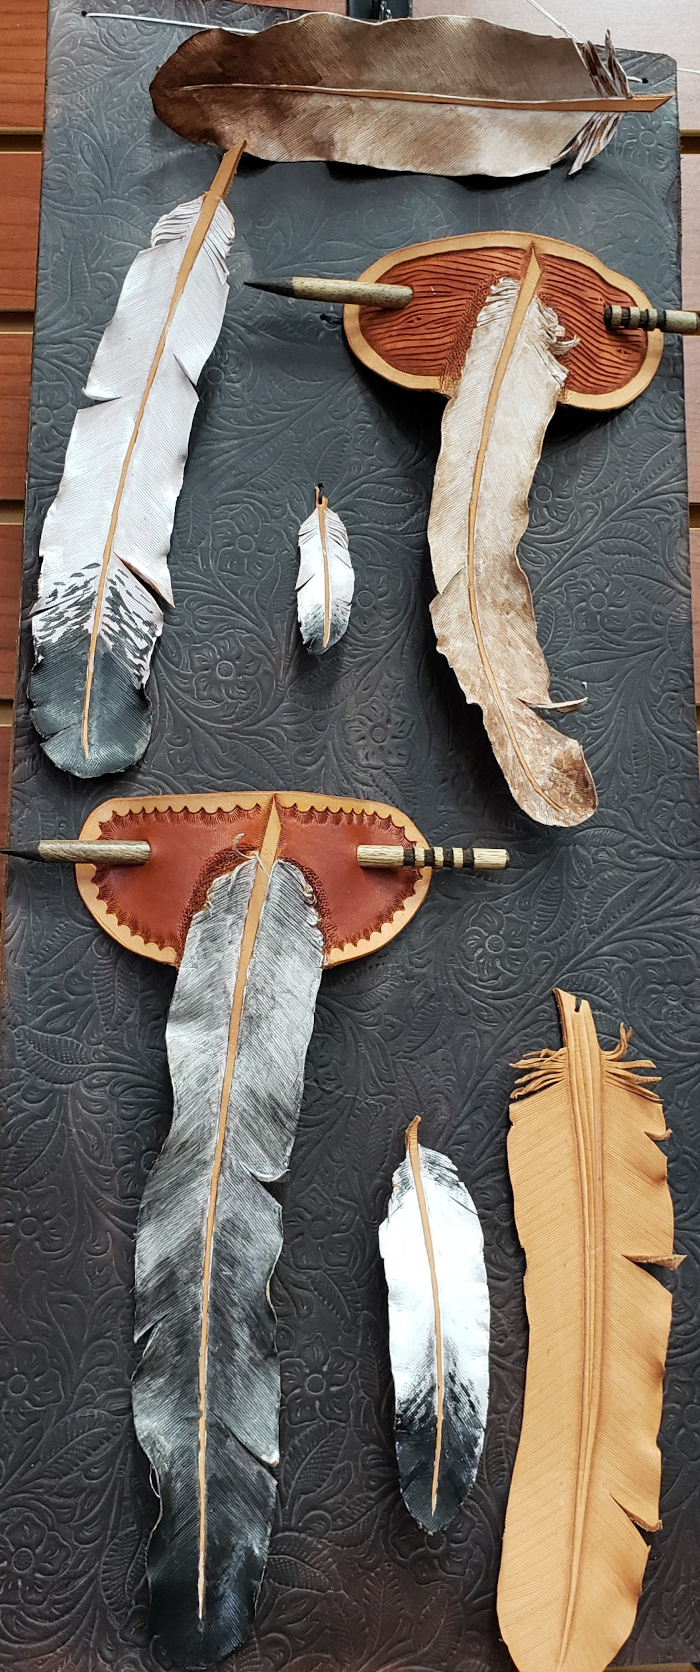
In the following photo, on the right, are the two feathers I did in the video.  I painted the middle one with a silver acrylic.

In this one, I did not cut free the top of the feather, but tooled the piece that the leather is still attached to, to look like a separate piece of leather.

You can see Jim Linnell's feather class at:
Tandy's Facebook Videos
And his feather patterns are free at:
Elktrack Studio

Have Fun!!

Wednesday, July 21, 2021

HOLSTER MAKING

 There is no better reference book than Al Stohlman's book on Holstermaking.

It shows you how to design your own holster and how to build various variations into your holster.

But there are a few points I want to expand on.  For example, none of Stohlman's holsters in that book were lined.  And nowadays there are many methods of wet-molding that can make a difference to the technique you follow.

First, let me suggest this sequence of making a holster:

  • I would first make the paper pattern, transfer it to a piece of leather and make a prototype just to make sure the basic pattern translates to a leather holster as expected.
  • Then transfer the corrected pattern to good leather.
  • Now tool the leather and dye it.   Do NOT seal or condition the leather - you have to be able to get it damp for the wet-forming step.
  • Now cut it out, mark the stitching lines and stitch the holster - remember that the leather will be vulnerable until conditioned.
  • Get the leather damp and wet-form it by pushing your seran-wrapped gun into it.   Work careful so that your tooling is net affected - stretching tooled leather while wet-forming, can diminish the depth of your tooling.
  • Let the holster dry and then apply sealer  conditioner on the outside and conditioner on the inside.
This post will be added to as I get seasoned holster makers to give me their input.

Here are useful comments I have received:
From JR Parker: 
"Holster making is one of those skills you learn by doing. The above book is a good general reference for "field" type holsters (but it is dated). It is not a reference for modern practical gun leather.
My best suggestion it to take a class or 3 from someone who is skilled at the craft. Master the basics before trying to teach others.
I'm of this opinion simply because a holster is not like a billfold, wallet or belt. If you get it wrong it may have dire results and someone cold be injured.
Think of it like saddle making. Would you buy a saddle from someone who doesn't know anything about horses or saddles?"


Thursday, June 10, 2021

Darkening

 MYTHS:

  1. If you store leather in the dark, it will not darken.
    Well, it is not light, or sunlight, or UV light that darkens leather.  
    It is air - oxygen - it is the tanins in the leather that oxidizes with its contact to air, that turns a darker color.
  2. Oil makes leather darker.
    No, oil might accelerate the oxidation process.
    When all the tannins have oxidized, you can add as much oil as you want, the leather will not go darker.
  3. Leave leather in the sun to make it go darker.
    Well, it might just accelerate the oxidation a bit, but it is still oxidation that darkens the leather.
  4. Saddle-Lac, NeatLac, Resolene will prevent the darkening of vegtan.
    No, all it might do is temporarily seal off the leather fibers from the air around it.  As the finish wears through and the fibers get exposed again, they will oxidize once more.

Here is an example of two sample sheets made about two years apart -  you can see how much the leather oxidized under Resolene.  The newer one will oxidize too, but nobody can say how much - that will depend on the recipe used to tan the leather - the more tannins, the darker it will oxidize.


Long ago in a guild we experimented with a complete UV light blocking finish we got from France.   It was a bit slower, but the leather with that finish on, still turned darker.

Then one day I saw a kit that had been hanging at the very back of a peg on the wall at a Tandy store.   The leather of the kit was the normal light color you expect in a vegtan.
Except for a very small round spot that had darkened - it was right next to s small hole in the plastic.   The leather darkened only in that one little spot.
This made me think that it was not light that had any effect - that whole piece of leather was exposed to the exact same amount of light.   The only difference was the exposure to air.
I asked the question on the forum of the Leather Chemists of America, and they confirmed for me that it is oxygen that oxidizes the tannins in the leather that makes for the darker shade and not light.

There is an interesting aspect to this:
When leather is exposed to sunlight for too long, it bleaches to a very light unnatural color.
And the moment you touch that leather with water, it immediately gets to its darker oxidized color again.  
You can see that on this sign that hung in a store window for a long time and got afternoon sun every afternoon.   All I did around the buffalo head was to paint it with clean water (and when I took this picture, that water had dried totally).


Sunday, April 25, 2021

Bag Strap

 My friend Lauren introduced me to this strap design.

I will add a diagram soon as well as a photo, but in the mean time, here is the video:


***

Wednesday, March 24, 2021

Mottled Effect

 There are some beautiful projects out there where people have created a mottled effect - some with shaving cream (see Marbling) and with many other techniques.

This inspired me to try too and it came out so nice that I just had to share.

My first attempt was to dab at the leather with a piece from an old shirt:


The last few dabs were with a dark brown and made it look a bit dirty here and there.


Next I used red, light brown and dark brown, dabbed on with a piece of trimmed sheep wool.

This was the look I was after!


I decided to make a brown only one and see which one would best fit the center piece of the valet tray it would be part of.


I chose the brown one and here is how the application of a conditioner made the color pop (I used dubbin for the conditioner, but something like Dr Jackson's Hide Rejuvenator or Aussie would be just as good).

*

Then came the video:

And this is the pieces after the fun was done:


I will add photos of the completed projects....

*


Thursday, March 11, 2021

Freehand Weave

 The first step is the design the weave - well described in the video.
Transfer it to the leather, cut line with the swivel knife and bevel the ribbons as each of them dip below the others.

The leather is a milled Sienna side from Tandy - look at the beautiful texture!


Then you employ the 6900 stamp to enhance the corners as shown in the video - this is what makes this weave so special and easy:  two stamping tools only for the weave.

Here is the video:


This shows the veiner used for the border:

*


And this is after blue purple on the border and covering everything with brow Hi-Lite stain:


Have fun with your own variations!


Sunday, February 28, 2021

Stitching ClampFree

 Classic Saddlestitch is done with the project clamped in a stitching pony or stitching clam, and the awl and one needle held in one hand and the other needle in the other hand.

If you do not have something to clamp the work in and your project is small enough, you can achieve the same stitch freehand.

The video shows how.


*


In the video I mention finger gloves / finger cots.  Here is what the packaging looks like.  I cannot remember where I bought them.


Here is a more comprehensive post about hand-stitching, if you want to kick it up a notch:
Hand Stitching Leather

Wednesday, February 3, 2021

Swivel Knife Blades

 A lot can be said about swivel knife preference and quality, etc..


All I want to do here is show the different blades that leatherworkers might come across.


I acquired the crystal blade in a batch of old tools that were used in the seventies.  Here is an ad in the Leather Craftsman published in January 1960.


Sunday, January 24, 2021

Resist and Antiquing

 I did a test to show some of the options with resist and antiquing. 

This photo shows my preparation for the process:


I first stamped the top piece of leather with the hats and slightly beveled around them.

Then I applied Neatlac in specific spots as I will soon explain.  Those areas stayed dark, even after the Neatlac dried, and I realized I would have to do the same on another piece of leather that was tanned differently.  You can see the difference in the effect of the Neatlac.  I did the same on both pieces, so when I refer to "B", it is the second hat from the left in the top row, on both pieces of leather.

A:  No resist, no dye.

B: Both hat and background resisted.

C: Just the hat is resisted with the Neatlac.

D: Only the background is resisted.

E: No resist, no dye.

F: Hat painted with white acrylic paint

G: Background dyed with Java brown water-based dye.

H: Background dyed and hat resisted.

After this, the Hi-Lite stain was applied:


Here is the result:


On both pieces the background dye around G and H almost completely disappeared - I think the Java brown dye and the Chestnut Hi-Lite colors were too close for the dye to show through in contrast.

And here is a quick tip:

After applying Hi-Lite stain, you always have to seal it in, because the stain leaves a residue on top of the leather.
If I am happy with how my project looks at this stage, I will often simply spray it with Leather Sheen aerosol - goes on shiny and then after five minutes you cannot even see that it has been sealed. 

In this case however, I wanted to get the Hi-lite stain off as much as possible and also make sure that the color was on as even as possible.   To do this, I applied the Neatlac with a sponge as you can see in this video:


All that remained now was to apply white acrylic paint to the hat in E.  In this case it was not very successful, but with things like flowers, it is often nice to get a bright color going on top of the Hi-lite stain.  I prefer option F where the Hi-lite stain slightly dulled the white of the hat, but you can see how much contrast there still is.

 The final result is as follows:

So I hope you can now see how you can use different pathways to achieve different results.

*

Pattern Transfer


In a discussion on how to prevent leather from stretching while you tool it,  Laurie Sackman-Lewis mentioned the product you see in the photo.
She said that she also uses it to enclose a design (laminated) so that you can just trace it.
I had to try and it worked well, so I made a quick short video to show how this can be done:


I hope it helps!
Thanks again Laurie

Monday, January 4, 2021

Cracking Leather

 Stop Leather from Cracking

"My leather cracks when I fold it after dyeing.  Help!!"

This comes up often as a problem - here is my take on the issue:

First Question:   Are you using the Eco-Flo water based stain from the square bottle?
If you are, please read this blog post (it covers the two important secrets in using this stain - shake and long application):

Next Issue:   The dye changed to very top layer of the leather.   This will take some explanation.

If you aggressively fold leather as it comes from the tannery, the outer layer will probably stretch enough so that it does not crack.

Now think of the leather fibers as the same as the hair of a paintbrush.   Easy to bend over, until you use it in paint and you do not wash it.   They dry very stiff and hard.

Exactly the same happens to the leather fibers that you dyed.   People think it is the dye that dries out the leather, but you start off with dry leather.  It is now the leather fibers that stick to each other.

To solve this problem, there are a few things to consider:
  • You can bend the leather while it is damp and the leather can stretch more.   This can be when it is still damp from the dye, or you could get the whole piece damp again.
  • You can treat the leather with a conditioner such as olive oil, neatsfoot oil or any of the waxy greasy conditioners out there.   After it has penetrated the leather, manipulate the leather to give the fibers a chance to work them selves loose and become lubricated.
  • Not all leathers are tanned with the same recipe - some may easily accept an aggressive fold and some may crack just because of the way it was tanned.
  • The thicker the leather, the further you expect the outer layer to stretch, which could also be a factor.
Keep these points in mind and test with cut-off pieces what works best for you.

There is a lot of opinions out there about oil and dye / before and after.  You have to be VERY careful with this advice!!!       Please read this:

I will add to this post as I think of more things.
Have Fun!!!


Saturday, January 2, 2021

Cutting Straight


Yes, I know:  you have cork under your ruler.....

BUT.....Cutting against a metal straight edge will work well, until you cut a big piece for an expensive project.
And then the straight edge will slip and you will cut into your project leather......     [Learning from a friend...]

So I suggest this:
Use a ruler / straight edge and a scratch awl to mark the line where you want to cut.  Then make the cut freehand!

Because during the marking phase you can focus just on keeping the ruler straight.   Then when you do the cut, you can just focus on that and do not have to worry to also keep the ruler stable.

Here it is in action: