Wednesday, May 27, 2009

Top Hat 2

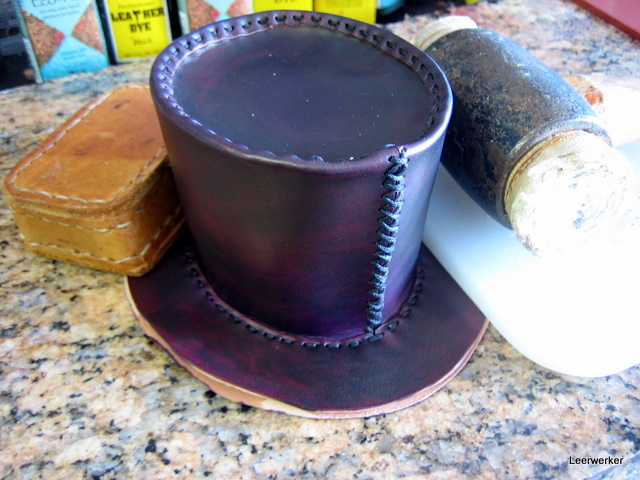
This is a continuation of the instructions started in Top Hat 1

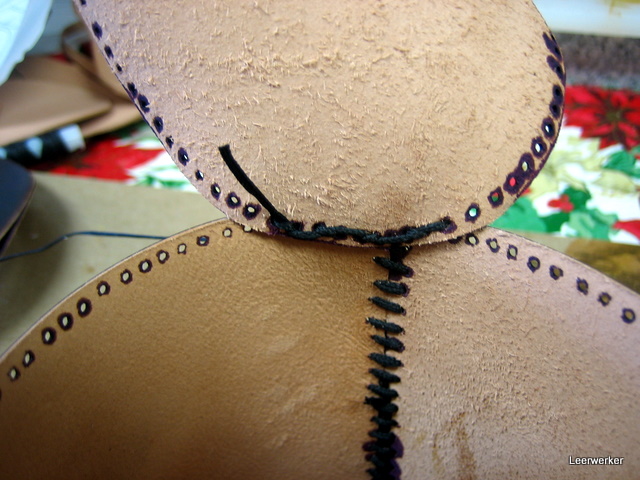
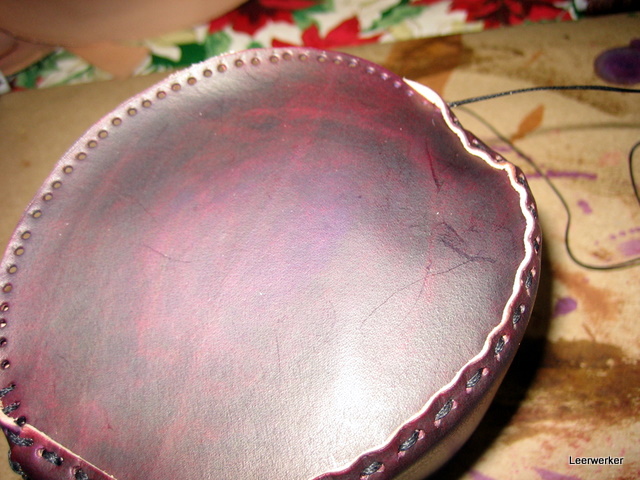
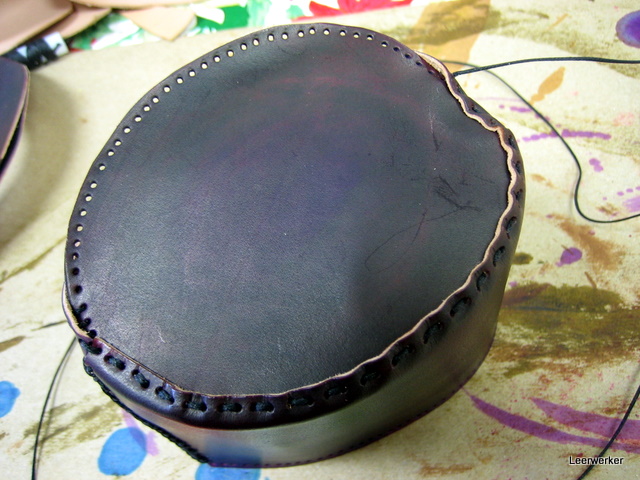
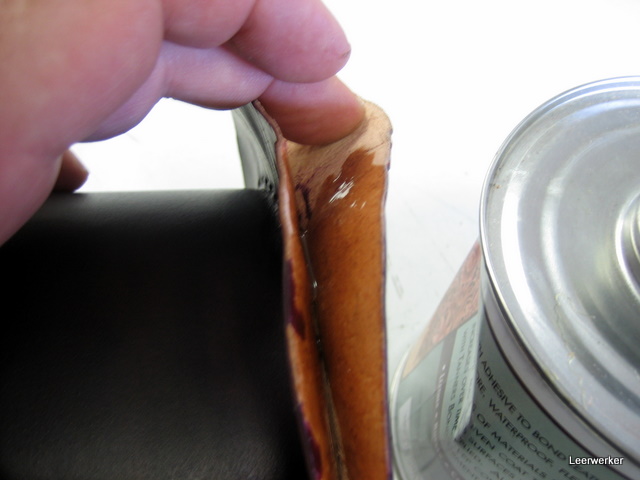
To make the next step easier, get the lower rim of the bowl a bit damp again and curl it outward with your fingers as shown on these two images.


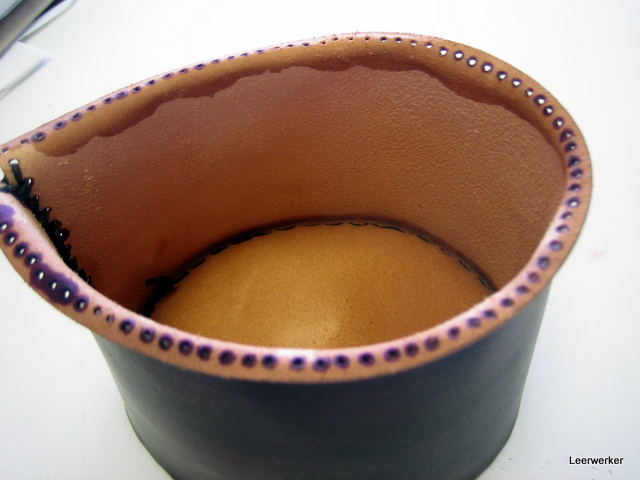
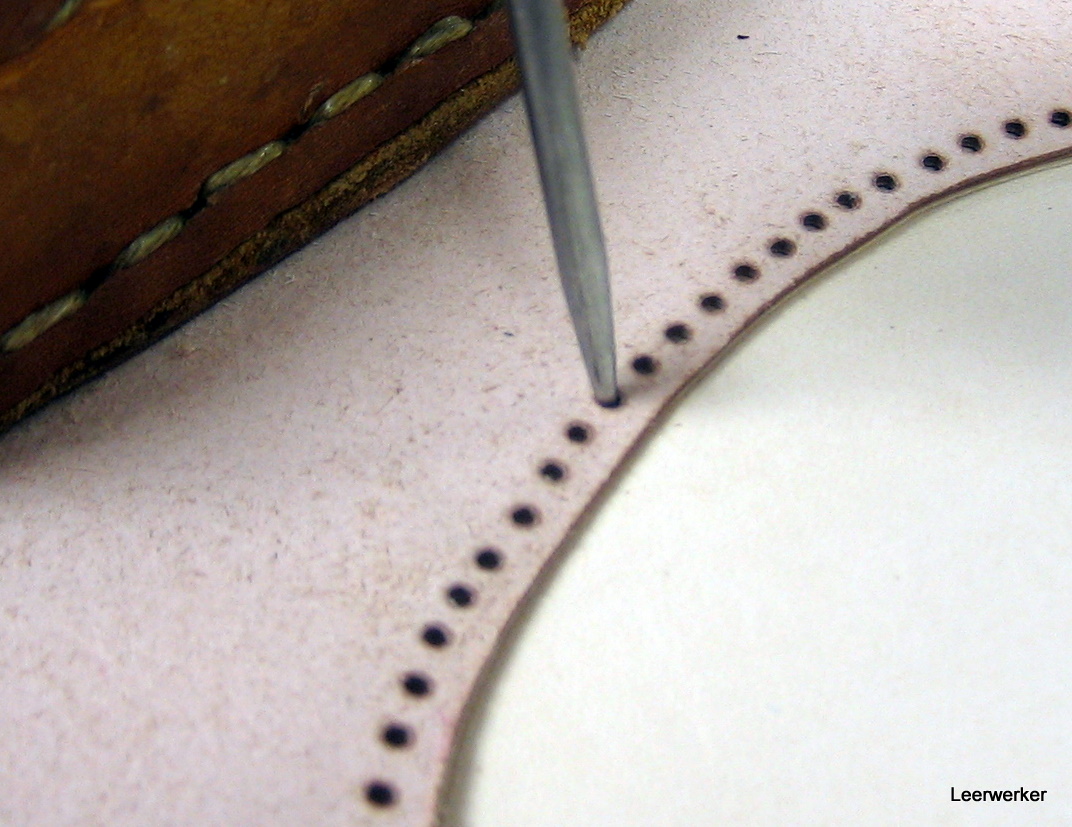
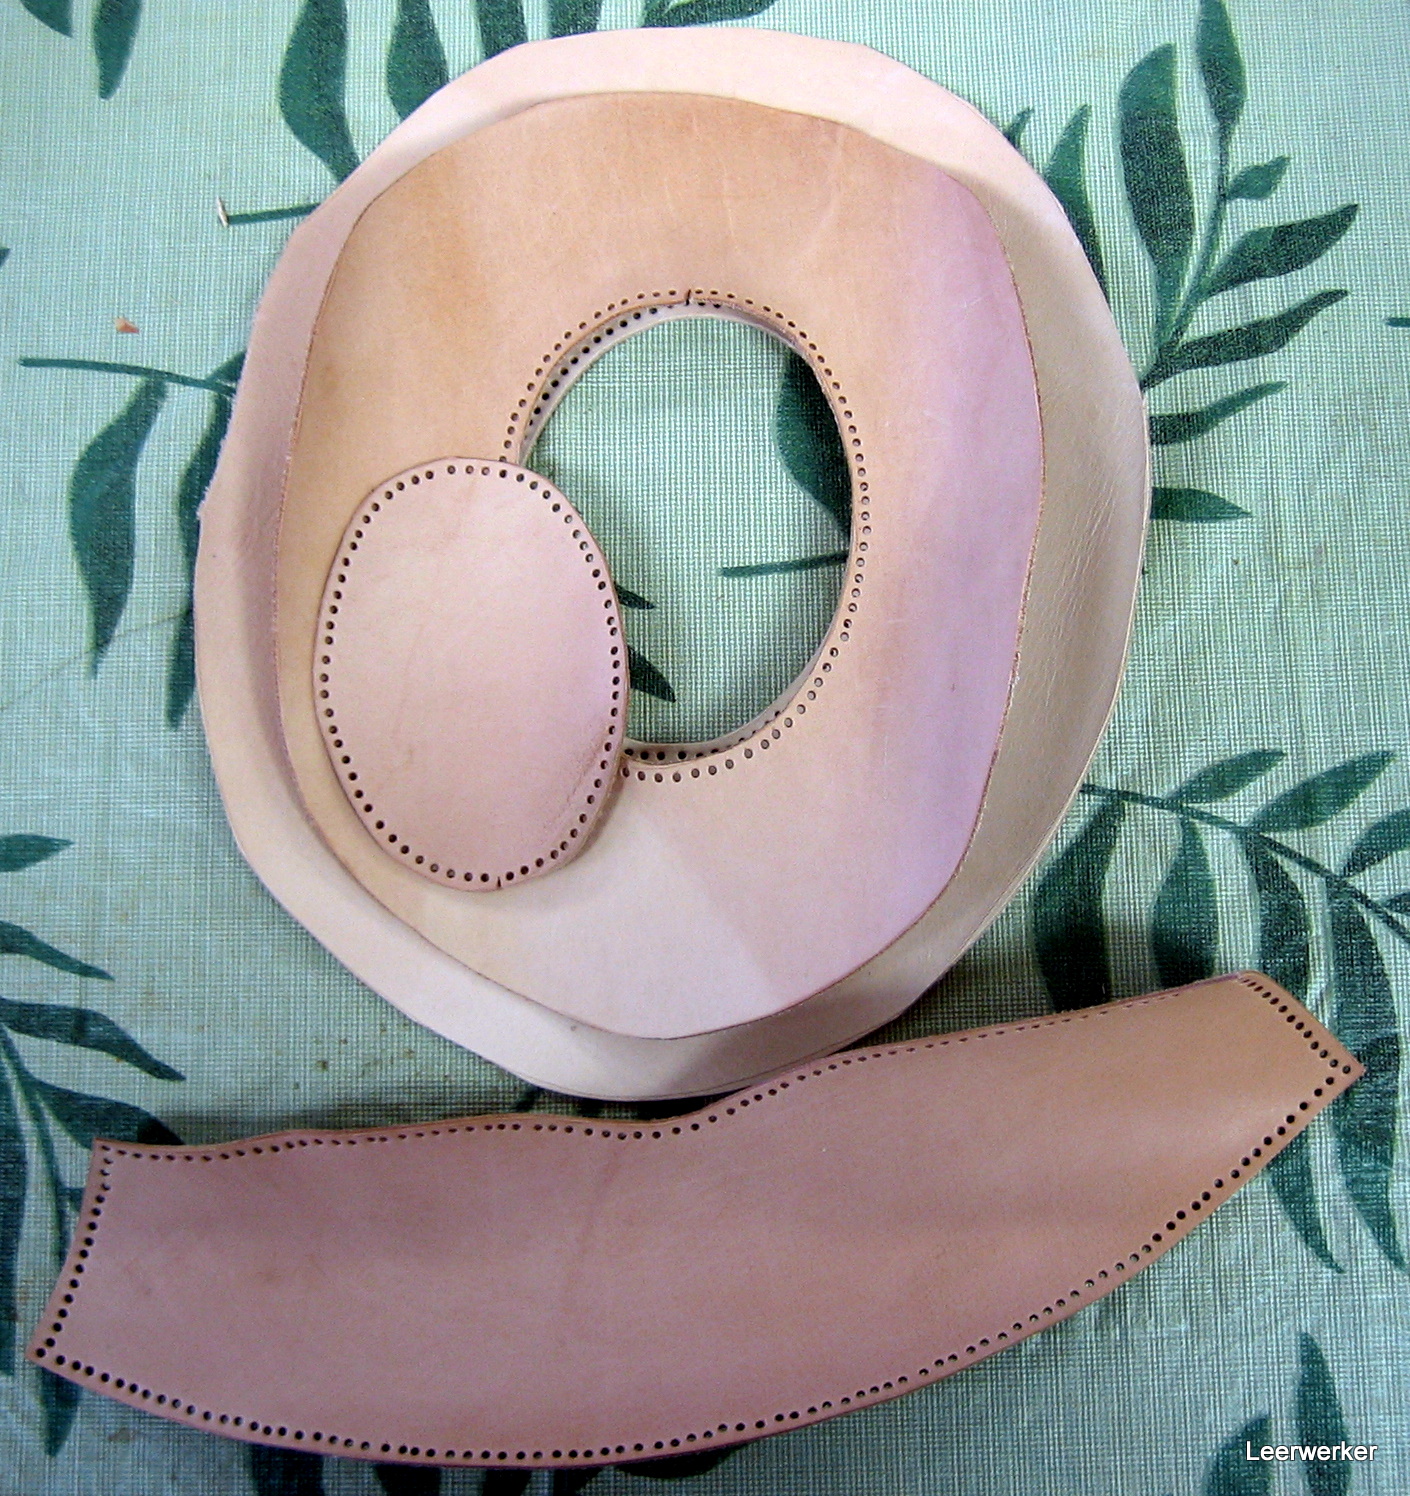
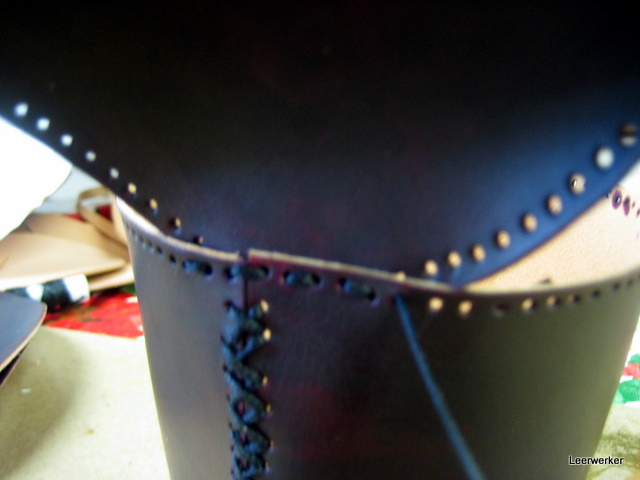
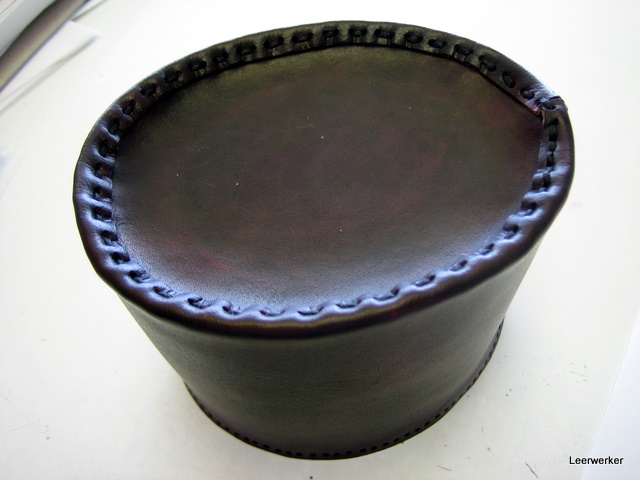
In the next picture you can see how the bottom rim of the bowl is going to fit in between the two layers of the brim of the hat.  I find it easier to first stitch these to the bowl before I glue the two of them together - their holes have to align perfectly and that will be near to impossible if you first glue them together.


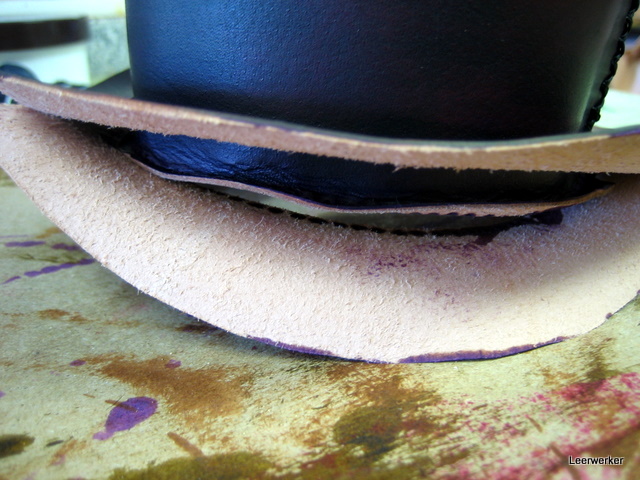
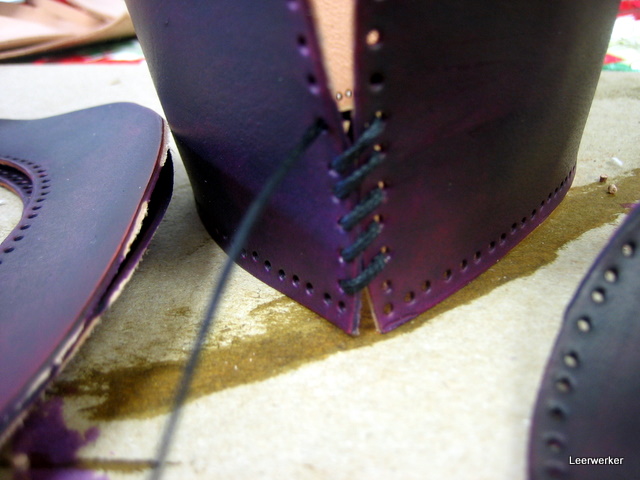
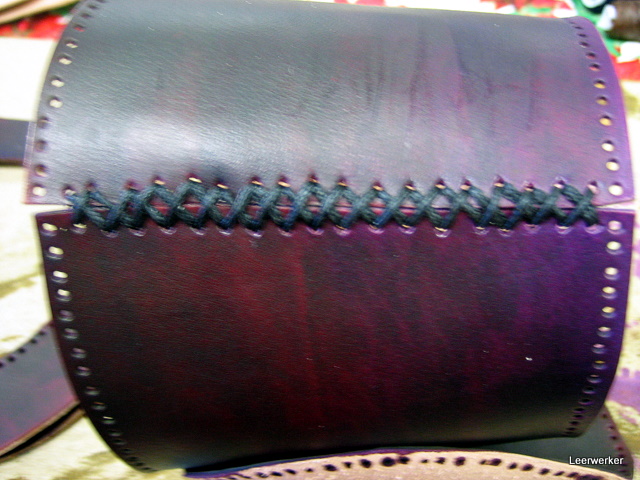
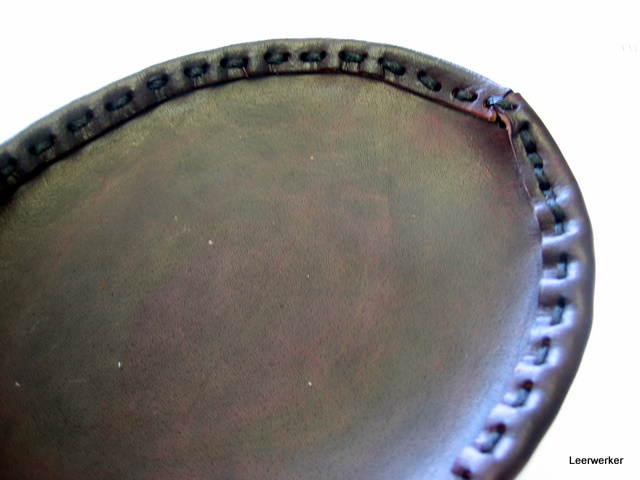
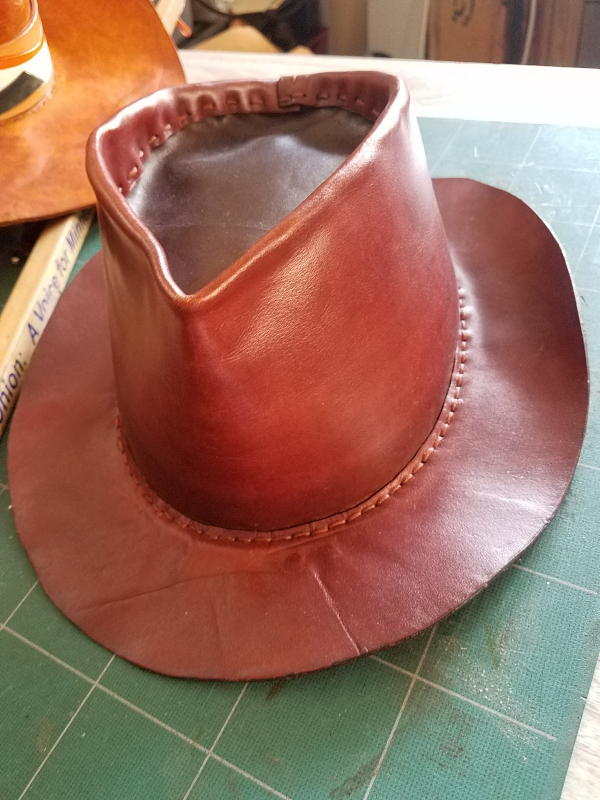
Stitching the bowl to the rim will mean that you stitch through three layers - from the top:  
* first through the top brim layer, the one than was cut to exact size
* then through the bent up bottom edge of the bowl
* and below that through the "upside down" brim piece that was cut oversize.

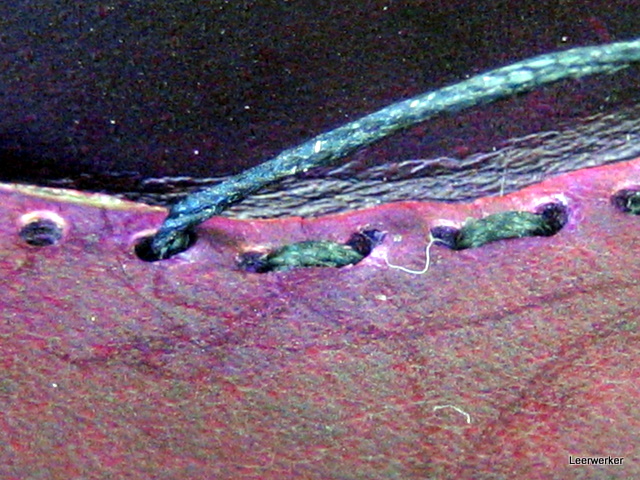
The trick with the sewing now is not to miss any one of the three holes that you have to go through.  Again I am just using a running stitch.

I wanted the brim of this small little hat to be totally flat and it was slightly wrinkled - so I weighed it down overnight before I glued it.

With my fingers I slightly spread the two brim pieces apart and apply the contact cement on both sides in between.
If I then want to curl the brim up on both sides, I do one side at a time:  first curl up only the upper brim part and then with your other hand, fold the bottom brim part over so that they get attached in shape.

All that remains is to trim the excess off the bottom brim part to exactly match the top part and then smooth and treat the edge.


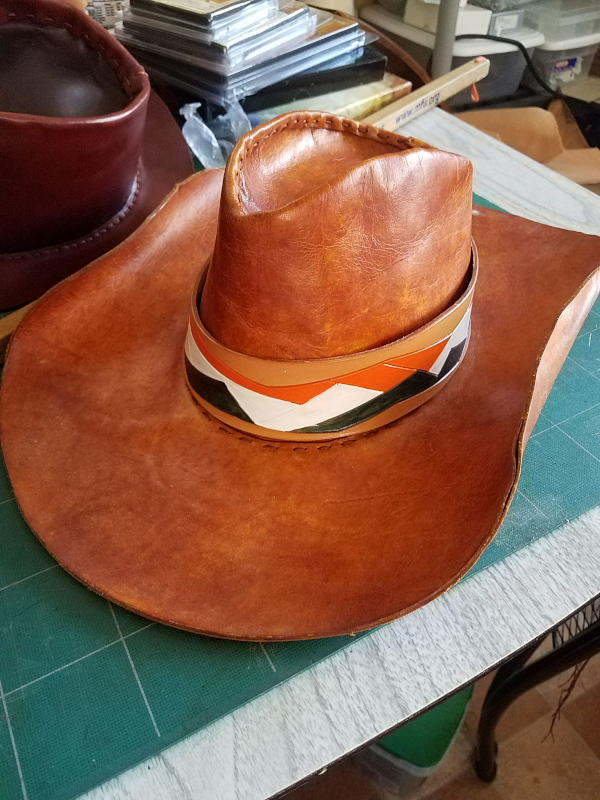
If you make the brim of the Hombre cowbay hat narrower, you get a nice Fedora style hat.

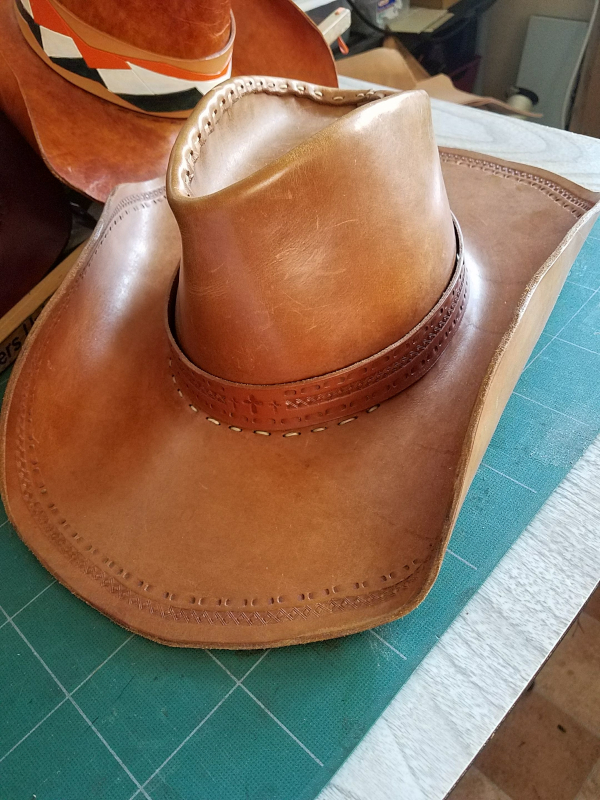
My second cowboy hat was done in 2-3oz leather and still keeps its shape nicely.


My first Hombre cowboy hat - made from 5-6oz leather - too heavy, but it sits so comfortably that I don't feel the bit of extra weight.


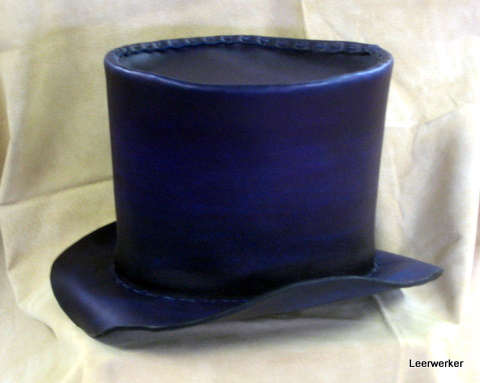
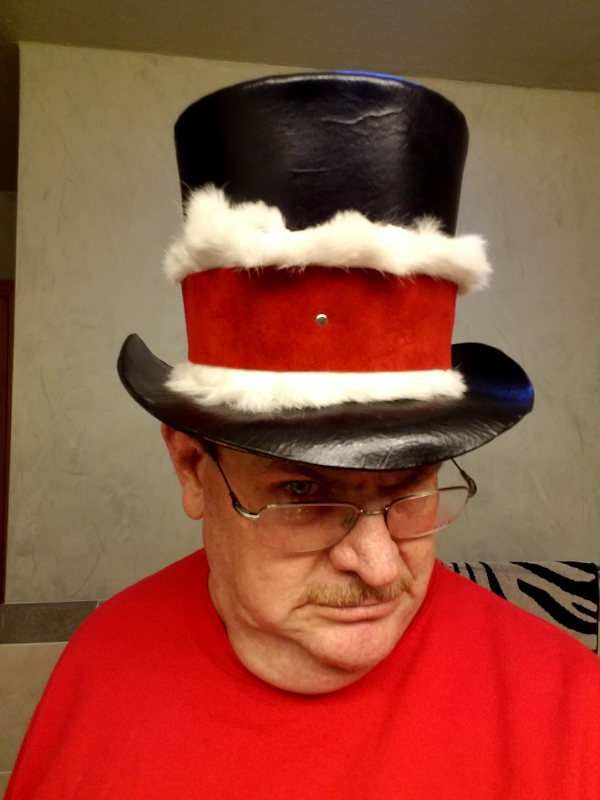
I made the bowl part of this top hat longer and with interchangeable hatbands it becomes a Christmas hat!


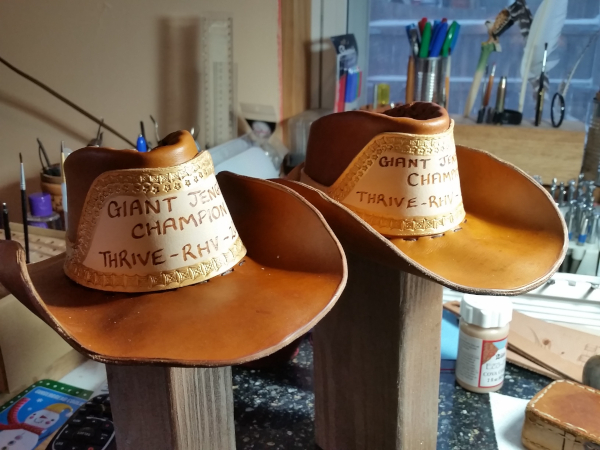
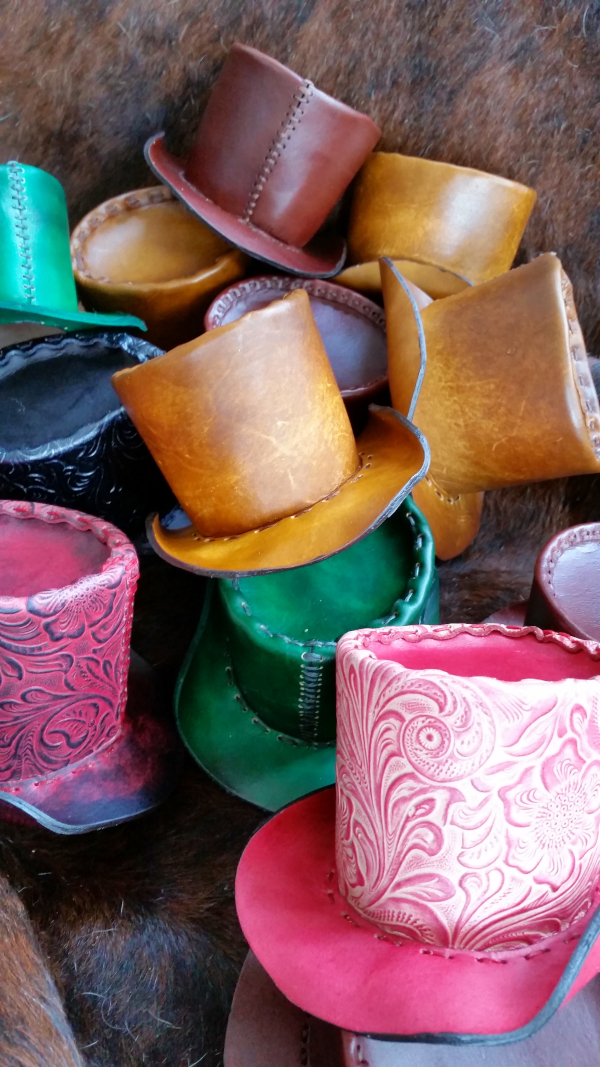
Two half size cowboy hats that were given as novelty trophies at a men's retreat.


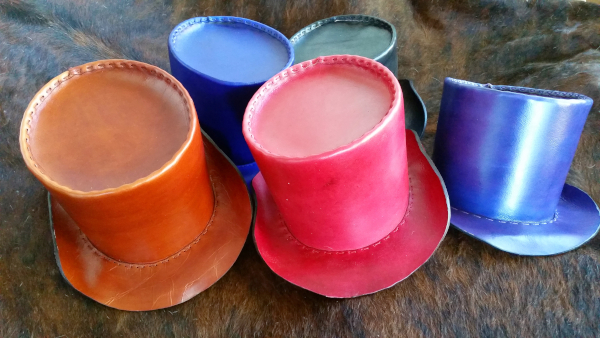
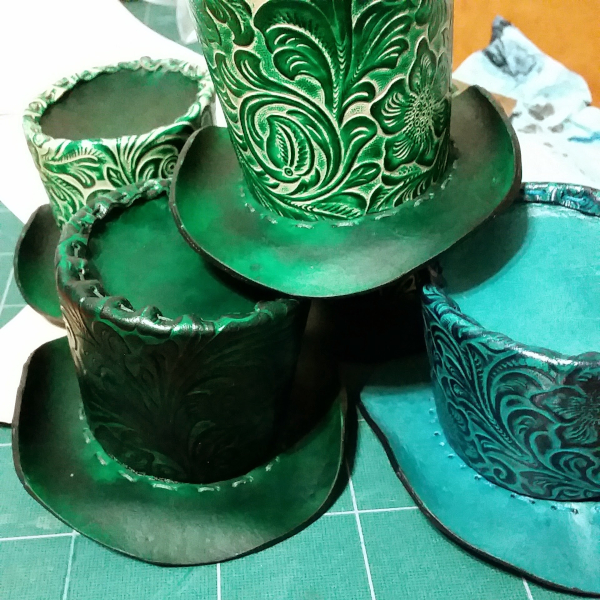
A whole bunch of half size hats I made for someone to sell at an Irish Fair.  For some bowls I used pre-tooled leather that I just had to dye.


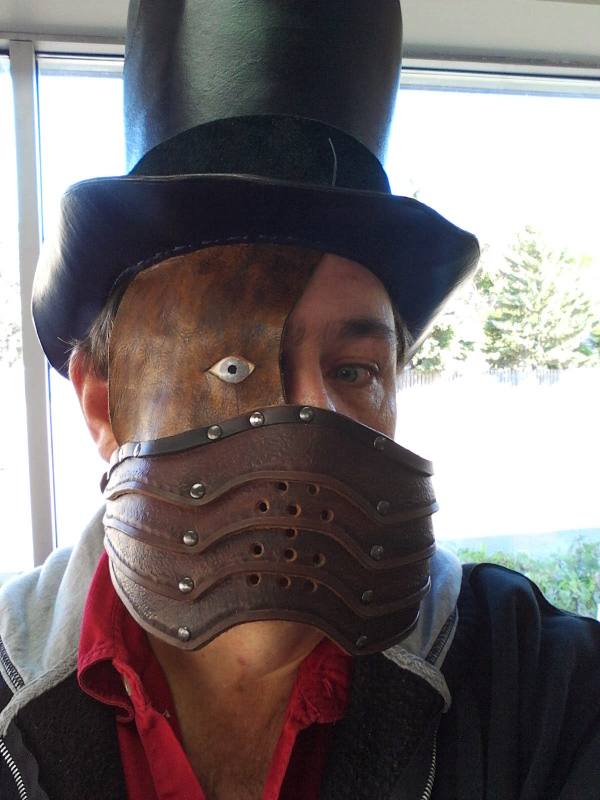
When sewing the brim to the bowl, I sewed in a mask I made, to make a bad-ass haloween outfit.  (The eye is made of leather as well.)


Have fun!!


[Updated April 28, 2020]

Saturday, May 23, 2009

Top Hat 1

I have made many of these hats, some full size and some half-size.
Links to download the half size tophat patterns are at the bottom of this post.
The patterns for the full size hats, in four styles, can be found at 

You have to transfer the patterns to the leather very carefully and accurately. 
The advantage of these patterns, is that the stitching holes are pre-indicated on the patterns, which makes the hats very easy to put together!

To know what size to make the hat, cut one of the brims out of cardboard and fit that on your head.  It should just sit comfortable.

 I first trace them onto tracing film with a very thin sharpie - make sure you get the exact position for all the holes. If you get the holes accurately on the leather, the hat practically builds itself.
I dampen the leather with water and then trace the hat parts down onto the leather from the tracing film.

Cut one brim out exactly and punch the holes. That is the brim that you see here lying flesh side up on the large piece of leather from which the second brim will be cut (the brim consist of two layers that are eventually glued together. So you can go as thin as 3oz leather for the brim pieces.
The first piece is placed upside down on the bigger sheet of leather so that they touch grain-side-to-grain-side. The inner circle and stitch holes are marked with great accuracy. The outer edge of the bottom piece is just marked larger on the outside and cut roughly - much bigger than the rim of the first piece. This will allow for curling up the brim into a snazzy shape later!
[Note the little "B": I was cutting more than one little hat at the same time and because I am using one piece as the template for the second, they become partners that have to stay together - they should be a perfect fit ... ]

This photo shows the stitching holes on the second brim being marked with a scratch awl:


As a second step, I cut the pieces out of the leather and punch all the stitching holes that have not been punched yet. I do this now so that when I dye the pieces, the insides of the stitching holes are also dyed and do not show up light against a dark dye job.


All the pieces have now been cut and punched: a top and bottom piece for the rim, and the long piece for the bowl and the small round top part of the bowl.

The third step is to dye the leather the color of your choice. 
 For the two hats you see on this page, I did the following: the big hat (with curled brim) was first dyed with a dauber and full strength Eco-Flow blue dye - really saturated so that I got it as dark blue as possible. 
 Then I took a rag around my finger, dipped it in Eco-Flow dark mahogany and rubbed the pieces all over to get as close to black as possible. I was careful not to saturate the leather with the mahogany - I wanted a dark "two-tone" effect.

The small hat (with the flat brim) was first dyed with the purple Eco-Flow dye and then rubbed over with timber brown.


CONSTRUCTION

Once the dye is dry, you can start sewing the hat together. I do not use any glue on the seams - the hat is three dimensional and has to take shape as you sew it. It would be just too difficult to glue the pieces in place before sewing.
Take Care: Do not put any dressing or conditioner on the leather before construction is complete - it helps to get the leather damp as it forms itself into the shape of a hat...


The first seam to be stitched is the one at the back of the bowl to form the circular "tube" of the bowl. This is just a simple stitch where the threads cross on the front of the leather.
On the back (inside the bowl) the stitches go straight across to the corresponding hole - with the two edges of the leather overlapping all along the edge.
Take NOTE: in these photos the seam is done with the two pieces of leather butting up to each other, but it works better with the two edges overlapping.

.On the photo above I have just started and going up with one half of the stitch - then I will come down with the visible threads crossing those that are there already to form an X:

The next step is to sew the crown (very top part) to the bowl of the hat.  The pattern of this top circle of leather has a small notch on one side.  This notch is aligned with the seam of the already sewn piece.
I just use a very simple running stitch for all the rest of the sewing.  Starting with this seam round the top of the hat, the hat is starting to shape itself in three dimensions and the leather will become distorted.

Take careful note of the positioning of the leather here - the crown has its grain side to the inside flesh side of the bowl.


I keep the crown of the hat (flat round very top piece) dry and stiff, so that it retains its shape.  I dampen the top rim of the bowl while I stitch so that it can start to fold over as you can see in these images.
This makes it much easier to shape the bowl when this part of the sewing is done.
Make sure you do not miss any of the holes for the stitching - these are well planned and the bowl will distort if you get the holes out of alignment.


And that is where you should be now - with the crown now part of the bowl and the top of the sidewalls folded over.  The edges of the crown piece can also be folded a bit up, especially in the full size hats.


I am going to continue this instruction set in a second blog post called Top Hat 2, just to keep it manageable in size. 

You can download two .pdf files here for the half sized tophats - apology for the two filenames being slightly misleading:
(The pattern of the sidewall of the bowl is meant to print on legal size paper.)
Tophat Bowl
Tophat Brim

Friday, May 15, 2009

Line Drawings by Computer

Making your own line drawings with a very simple free program is very easy. 

 The program is Inkscape and the full instructions can be found on the LeatherLearn Website

A Screenshot of the program with a completed line drawing: