Showing posts with label Basketweave. Show all posts

Saturday, February 1, 2020

Basketweave Around Something

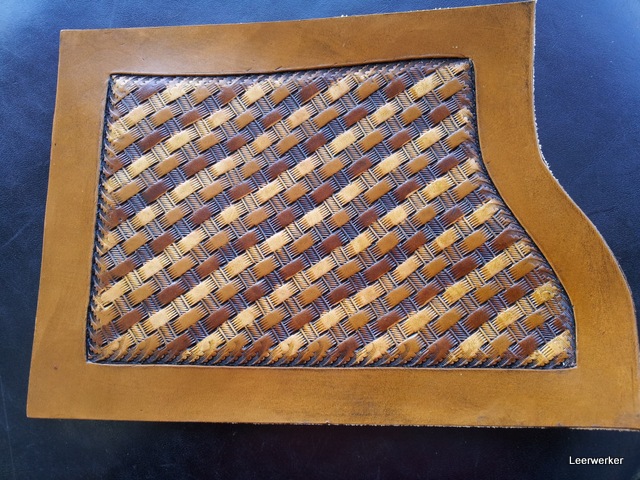
Large areas of basketweave always look good.  

But if your design calls for an initial or something right in the middle of a field of basketweave, like an island, the problem arises:  how to keep those basketweave stamp impressions straight and still aligned when you get to the other side of the "island". 

 I mentioned it a few times to my friend Gary Arvidson and last week he came up with this very simple, elegant and fail-safe solution!! 

 I use Chan Geer's method of basketweave - you can see that explained in this
  BLOG POST (second video).

 So here is my first line done and you can faintly see the circle where I am going to place an initial.  
 The second line done.
   
 
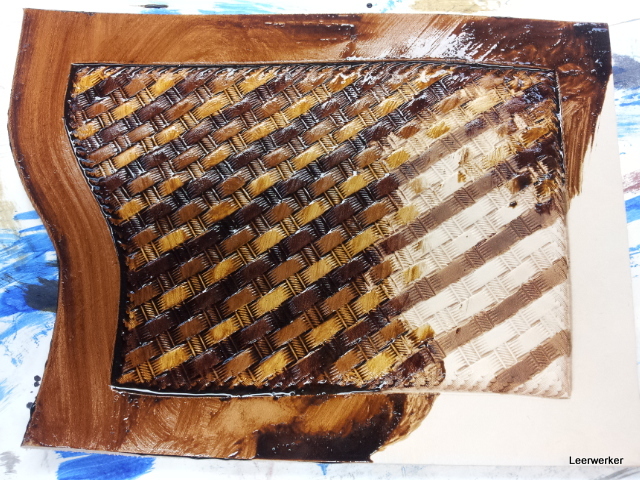
You prepare a thin 2oz piece of leather as big as the area that you do not want to basketweave on:   

Gary used rubber cement (not permanent) on the back of his thin piece, but for my first try, I used Eco-Flo water based contact cement - it acts much like rubber cement if only applied to one piece of leather.   
I let that contact cement dry overnight - still tacky enough. I also flipped the project around so that I can now do the rows that will flow around that island.  

 I am going to do a circle on the front and rectangle on the back of this journal cover. 

 Put the thin piece of leather on the "island" where you are going to put the initial, glue side down.  Have it somewhat damp as well.  And start stamping! 

 Where the stamp goes onto the thin leather, do not whack the stamp that hard - all you want to do is to mark the outlines of the basketweave stamp where it would have been if you did not have the island.


 Do one row at a time as you would have done, just with light pressure on the thin cover for the island.  You can see when I peeled back my thin cover that I had a little bit too much pressure on the stamp - it got through underneath.


But then, when I tool in the initial and the basketweave edge, all those marks disappear!


 In this video I do the back of the cover, basketweaving around a rectangle.


 After I am done with the back of the journal cover, I will add more pictures here.


Friday, July 27, 2018

Cable Organizers

I have been having a lot of fun making these cable organizers - they are used to keep your earphone or charger cables tied together and untangled. 

 They allowed me to play with tools I have not used in a long time and coloring techniques I want to test on something small.   And they make great gifts!  

 This video describes how to make a few rows of hearts with the meander tool:


 Then there are basketweave squares:  

 And spiraling basketweave:


 A simple woodgrain effect:  

 And coloring the wood: [To see how this one eventually turned out,  it is the bottom left-most one on the second photo above.]  

 Have Fun!!!!

Monday, March 31, 2014

Making a KnifeSheath

This post shows some basic steps in producing a simple project.


..and here is the second video - it is long but shows the full basket weave stamping and border stamping.

The first basket weave shows Chan Geer's method of getting the basketweave perfect every time!


If you want to see this method of doing basket weave in print, contact the 

Leather Crafters and Saddler's Journal.   

They can help you with back issues that the articles about basketweave was printed.


Video number five shows the saddle stitch by hand, using two needles and an awl in hand.


Tuesday, February 12, 2013

Resist and Hi-Lite

At our guild meeting in February we had demos on two tone dying.
One method that works really well on pre-embassed belts, is the same block dyeing that the hippies did in the sixties!
It starts with a belt that was dyed with Pro Waterstain in the bordeaux color (let it dry well for a few hours):
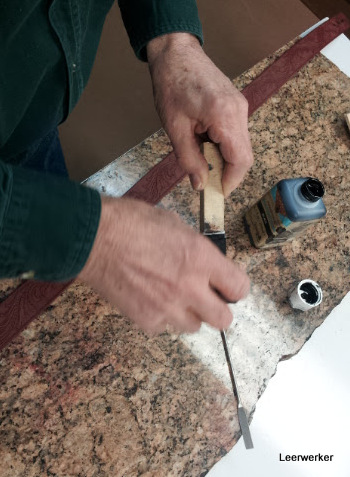
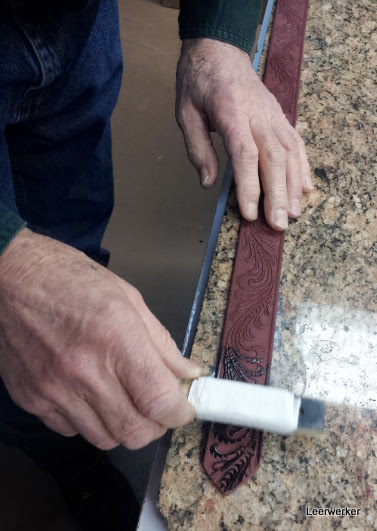
Next a small sponge is used to apply a darker or lighter stain to cloth that is wound tight around a flat piece of wood.
This is wiped lightly across the embossed leather so that just the tops of the tooled designs catch the dye.
The result is really great.  But, like all dyes, it looks fairly dull untill a finish is applied; and here you can see the difference:
Here are more examples Larry did last year:
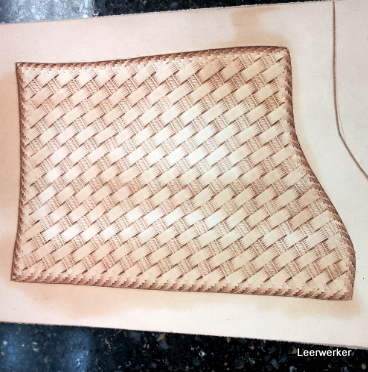
The other method we explored was resisting parts of a project.   This one started with a simple basket weave - you can use this on floral carving or any tooling you have.
Next you paint one row of the basket weave with super sheen and one row with a brown dye and let it dry well.  It will not look too defined at this point unless you are super anal and sit for hours with a very thin paint brush.
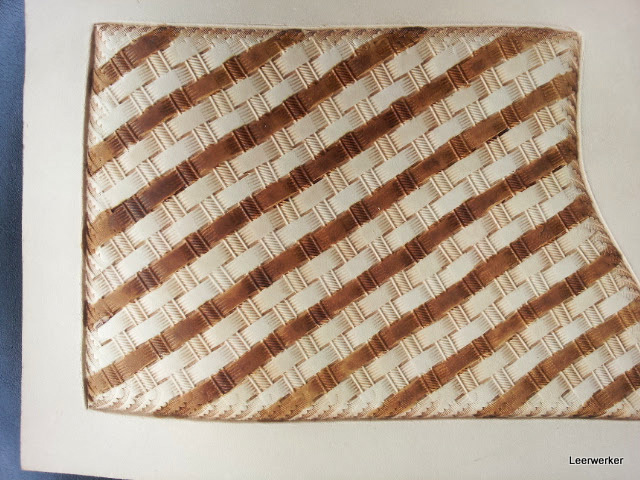
Then you follow the Mr Miyagi instructions for applying Chestnut Hi-Lite stain:  Wipe on - wipe off.
And the magic happens:
The other half of this piece of leather also got basketweaved, and the whole process was the same, except Tan Antique Gel was used in stead of Hi-Lite stain.
Close up:
I like the Hi-Lite more than the antique gel for this particular effect.
So one step further!  Add one more different line to the basket weaving - black dye.  So the four different rows you see here is: not treated / resisted with super sheen / dyed with timber brown dye / dyed with coal black dye.
And after applying the chestnut tan Hi-lite stain, the result is even better than I expected!
There is an older post on the leatherlearn blog about resisting as well:  just search for "resist".

Thursday, November 11, 2010

New Take on Basketweave


Tom Evans of Boarshead came up with this idea and I will probably mostly do basketweave backgrounding like this!

This is a piece of leather stamped with the basket weave background and Block-out resist painted on every second line of stamping

After applying Dark Brown Antique Gel

This one was done by Tim:  On this piece only the 'tops' of the weave was coated with Block-out. You can still see some spots that have not dried completely.

Medium brown Hi-Lite Stain (Tandy Item #2608-03) made this design come alive.

Here is another one I tried - this time with Super Sheen and a mix of Briar Brown and Raisin Mahogany Eco-Flo Hi-Lite Stain.

This video shows the technique in action:


A newer video about using this technique:

In 2017 I did a Live Video Stream showing the same - it's a bit long because it was live, but could still be usefull!


Updated May 24th, 2020