Welcome to my Blog
About Leatherwork
I hope it will inspire you.
Come learn about new things with me.
-- JOHAN
Welcome to my Blog
About Leatherwork
I hope it will inspire you.
Come learn about new things with me.
-- JOHAN
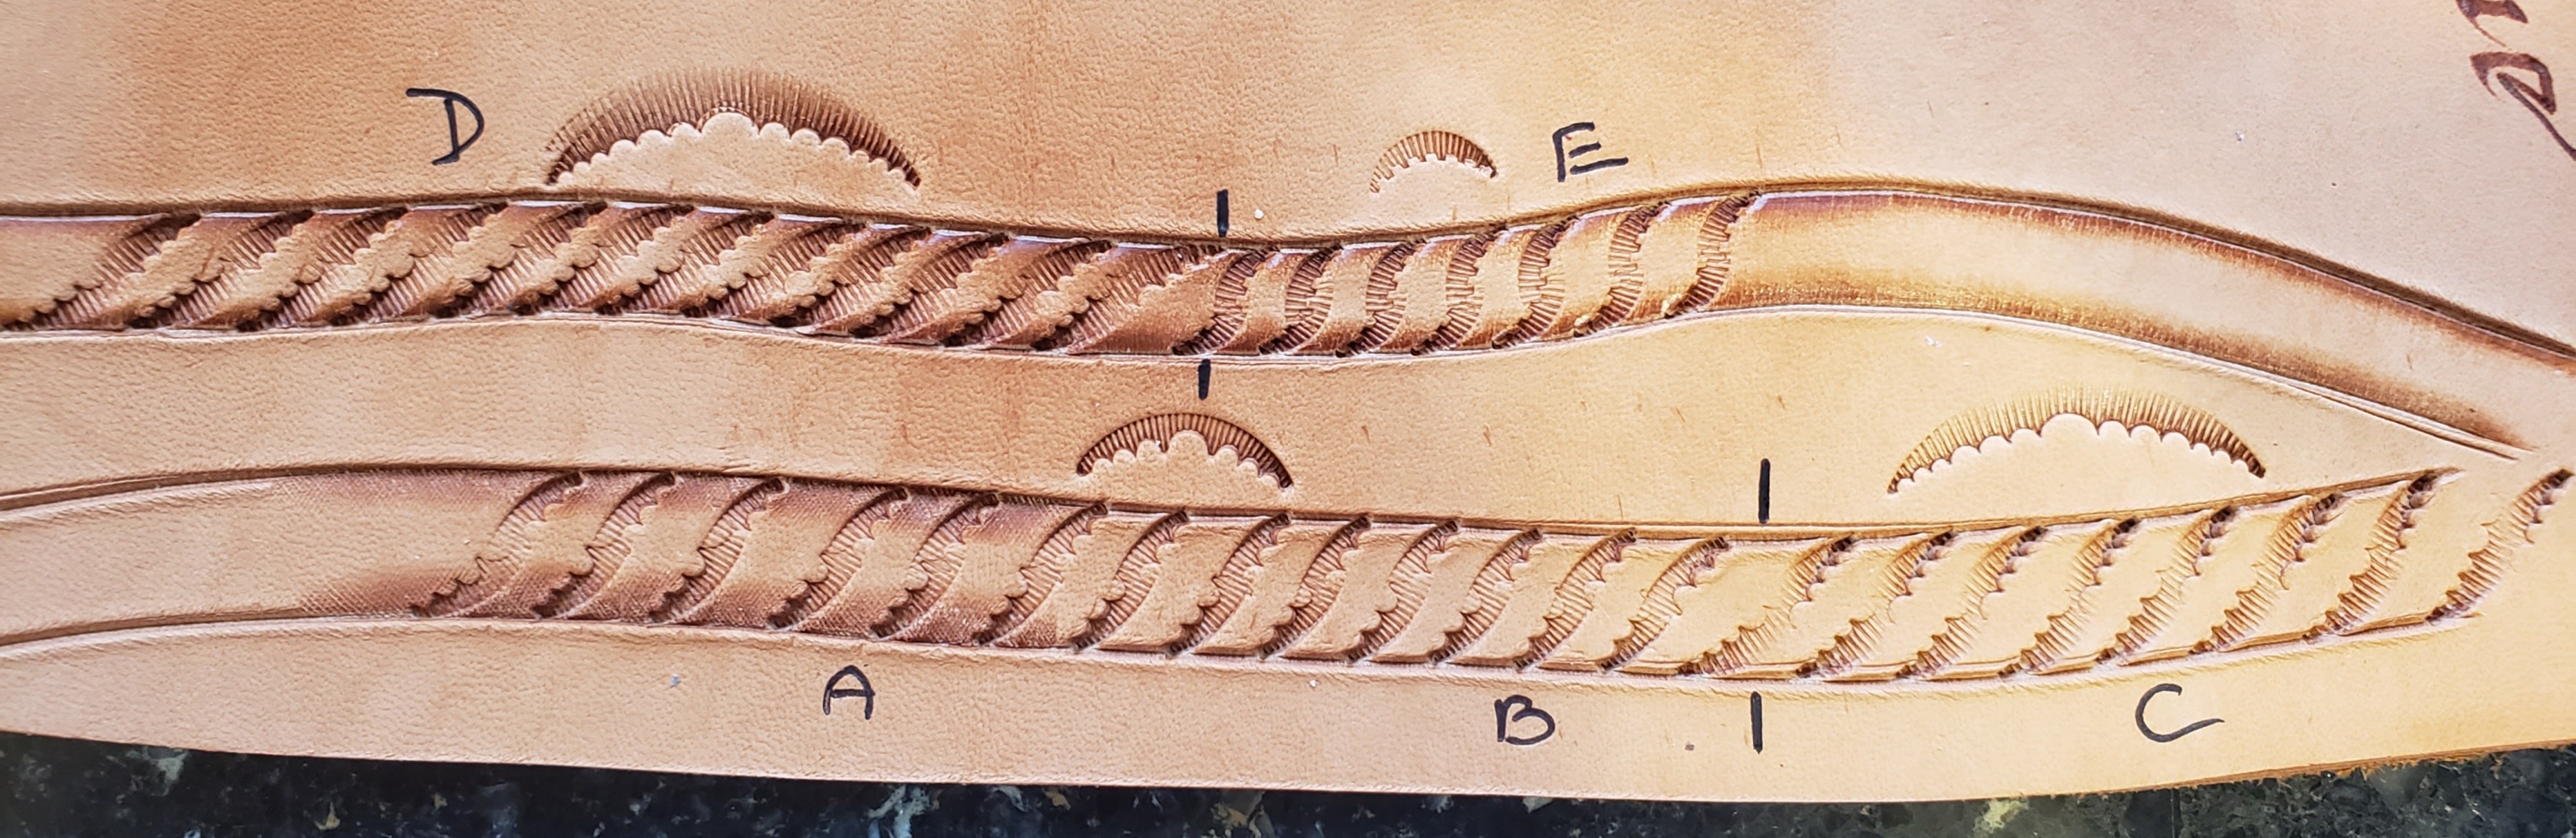
With the simplest of stamps, you can achieve an almost endless variety of border, background, and other effects.
I hope these will inspire you!


HAVE FUN!!!
This blog post will be completed as more videos are created. So this is really still a draft version.
I am also still testing the best way to get my TikTok videos here on my blog....

.jpg)

Back Braid
When putting a handle on a four stranded leash or key chain, you can use this method to form the handle.


STAMPING SUGGESTIONS
Our local leather guild recently came up with some stamping suggestions. Here are the results - I hope it inspires you!


Another blog post about this can be seen at