Tuesday, May 10, 2011

Quick Effective Belt


Need a fast gift? 

This is a pre-embossed belt.  That's why I put it under small projects - there is very little work involved in making this belt.
I used water and spirit based dye to roughly add the red and green and purple to the belt design.  I worked fast to get a more organic look.  I did not want a detailed dye job.

So after that was done the belt did not look so hot at all.    

Then I sprayed the belt with two layers of Supersheen to create an even, partial resist and coated it with Chestnut Tan Hi-lite stain.   It outlined the tooling and gave the belt, even with the red and green, a very well made look!

Sunday, November 14, 2010

Neck Purses


With Christmas around the corner, you may want to make a few quick gifts for the young kids in your family:

A small coin pocket that hangs from a lace around the neck. 
Their shape is not very crucial, so you can just draw up your own pattern from looking at these pictures. Even the construction of these are not complicated, so just study the pictures and let me know if you have a question.

Thursday, November 11, 2010

New Take on Basketweave


Tom Evans of Boarshead came up with this idea and I will probably mostly do basketweave backgrounding like this!

This is a piece of leather stamped with the basket weave background and Block-out resist painted on every second line of stamping

After applying Dark Brown Antique Gel

This one was done by Tim:  On this piece only the 'tops' of the weave was coated with Block-out. You can still see some spots that have not dried completely.

Medium brown Hi-Lite Stain (Tandy Item #2608-03) made this design come alive.

Here is another one I tried - this time with Super Sheen and a mix of Briar Brown and Raisin Mahogany Eco-Flo Hi-Lite Stain.

This video shows the technique in action:


A newer video about using this technique:

In 2017 I did a Live Video Stream showing the same - it's a bit long because it was live, but could still be usefull!


Updated May 24th, 2020

Wednesday, May 12, 2010

Embossing a Bird


Here are the first photographs of my latest embossing project: embossing a grey African Hornbil. 

The original photo was taken by a school friend of mine, Stephan de Lange.

 The first two photos show the design transferred to the leather, cut with a swivel knife and all the key lines beveled. The purpose of this is to be able to see the design outline on the back of the leather. So the leather needs to be well cased - the water has to penetrate right through the thickness of the leather.

 The leather used is a 4oz  Tooling Cowhide - beautiful soft stuff that 'almost carves itself'! The Design First Bevelling 

 The beveling shows on the flesh side of the leather. On the Back 

 I trace the plug on a thicker leather and make sure I trace all the important lines of the design so that I have guides to help me sculpt the plug. 

After tracing, I cut the plug out smaller than the original design. I reduce the size of the design for the plug by the thickness of the leather that will be over the plug - that piece that I beveled the original design on.

Plug Cut Out Smaller by Thickness 

 A French Edge Beveler and a scalpel blade are now used to shape the plug - this is done like a panel sculpture and you need to take care to so it with as much perfection as you want to show in the final carving. 
Even the slightest bumps show through to the surface. The sharpness of these tools are absolutely crucial to the success of this step. Sculpting  

You will see that I did not include the tail of the bird in the plug - according to the photo the tail is in the background and so I want that to be clearly 'in the background'. Plug Ready  

Now the outline on the back of the tooling piece is covered in rubber cement and the plug turned front side down to be glued in place. Carefully place it in the outlines you see at the back. I use rubber cement so that at this point the gluing is not very permanent and you can still move it. 

 An optional step before this, is to stretch the inside of the design a bit by rolling the leather over a small marble rolling on a flat surface. Glued on Back 

 The rest to follow soon!

Monday, June 1, 2009

Hardening leather or Cuir Bouilli

So many aspiring armor makers need information about treating the leather they make their armor with. 

And unfortunately there are a zillion web pages about the subject - both good and not-so-good.

To harden leather, it is heat treated. Here is the short version:
  • These methods apply to veg tan (tree bark tanned) leather.
  • Ideal heat seems to be 175ºF.
  • Much warmer than this will melt end shrink the leather.
  • Heat treating changes the chemical make-up of the leather and is not reversible.
  • Heat treat the leather by one or more of the following methods:
    • Dip in warm water - NOT boiling water.
    • Dip the leather in warm wax.
    • Dry the leather with a hair dryer.
    • Bake the leather in a VERY cool conventional oven.
I very strongly recommend you read a very comprehensive document, by the late I. Marc Carlson, about this subject. It has been around since the early 1980's, when the internet was text-only.

There is an attached copy of this document on the Downloads Tab at the top of this page.
*****

This is from leatherworker.net (by Daggrim - a now-retired leather helms maker from Minnesota):
I've had lots of experience with Cuir Bouilli, since every helmet I make is treated to harden the leather. I just use the hot water, and the leather is 10 to 13 oz saddle skirting.
The procedure is very time and temperature critical. I aim for a water temp of 175 to 180 degrees, and the immersion time varies from 2 to 3 minutes. A difference of just 5 degrees can cut your time in half, or double it, so you need to watch closely.
I pull it out for inspection every 30 seconds or so. As you treat more pieces, the water turns dark red, and you can't see the leather.
I pre-soak the pieces in room temp water, because if they go in dry, the thermal shock will just shrivel them. Do not allow the peices to touch the pot, it'll make hot spots, and shrivel it there. I use a folding round vegetable steamer in the pot to isolate the leather. Water at 170 will have some hardening effect, but you'll need to leave it in there for maybe 4 minutes, and it'll never get really, really hard. It'll dry more like heavy cardboard than armour.
If you start with stiff leather, it hardens very well, and if you start with floppy leather, it'll also never get really hard. When the leather starts to turn dark...get it out asap, because that's the point when it starts to shrivel. Leather brought to that point gets super hard. The flesh side dries like sandpaper, and the edges have just begun to curl.
I've hardened 8 oz leather, but it's tricky. You can't fudge on the temp...hit it with the full monty...175 degrees, but watch it like a hawk. It'll start to shrink earlier than heavier leather, and so you might need to do some tugging to reshape it. You have about 30 seconds to get the leather into a mold after you pull it. It's gonna be rubbery, so be careful or you can distort it with careless handling.
It'll start to set up in about 15 minutes, and then you can moderately shape it for about an hour. I've taken pieces that never got hard enough, and re-soaked them, them dried them in the oven at 200 degrees. They kinda flatten out and sag, but you can reshape them.
I leave them in for 30 or 40 minutes. They scorch where they touch the pan, or the screen.
So, there it is...way more than you asked for. I read lotsa stuff on the internet when learning this technique, and I took the parts that made the most sense to me. I'm also a little lazy, so I always try to K.I.S.S. a job as much as possible. I hate the Fuss Factor, and try to cut it out of all my processes. And lastly, the temps are what I see on my candy thermometer, so there might be variations with your thermometer.


Wednesday, May 27, 2009

Top Hat 2

This is a continuation of the instructions started in Top Hat 1

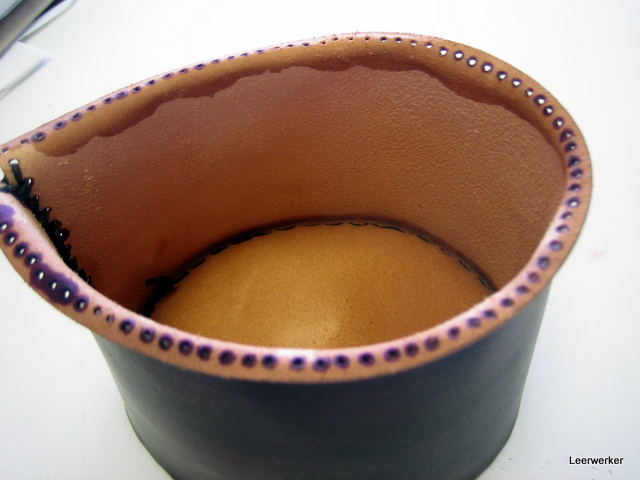
To make the next step easier, get the lower rim of the bowl a bit damp again and curl it outward with your fingers as shown on these two images.


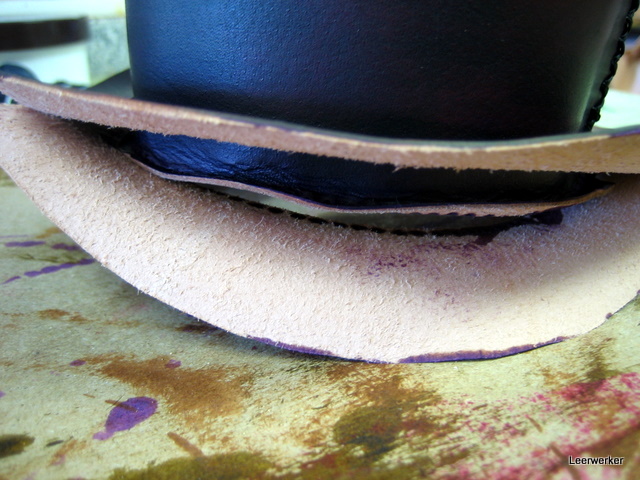
In the next picture you can see how the bottom rim of the bowl is going to fit in between the two layers of the brim of the hat.  I find it easier to first stitch these to the bowl before I glue the two of them together - their holes have to align perfectly and that will be near to impossible if you first glue them together.


Stitching the bowl to the rim will mean that you stitch through three layers - from the top:  
* first through the top brim layer, the one than was cut to exact size
* then through the bent up bottom edge of the bowl
* and below that through the "upside down" brim piece that was cut oversize.

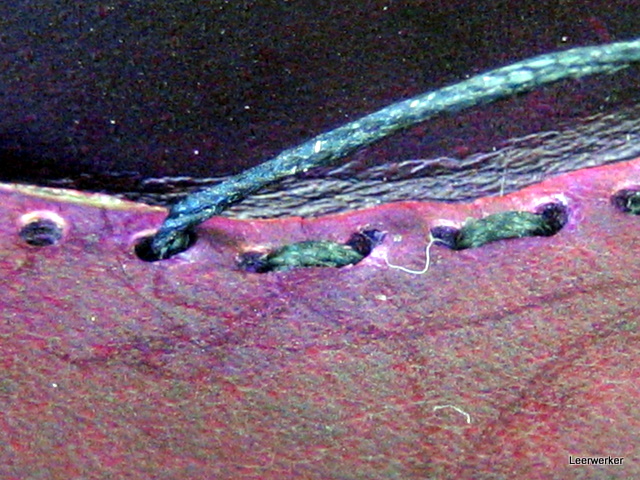
The trick with the sewing now is not to miss any one of the three holes that you have to go through.  Again I am just using a running stitch.

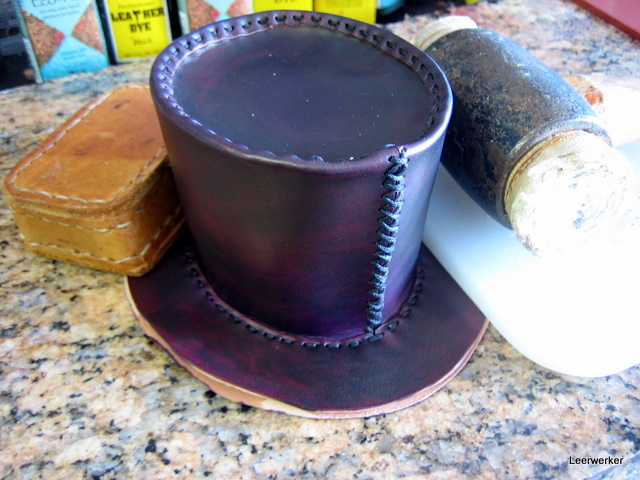
I wanted the brim of this small little hat to be totally flat and it was slightly wrinkled - so I weighed it down overnight before I glued it.

With my fingers I slightly spread the two brim pieces apart and apply the contact cement on both sides in between.
If I then want to curl the brim up on both sides, I do one side at a time:  first curl up only the upper brim part and then with your other hand, fold the bottom brim part over so that they get attached in shape.

All that remains is to trim the excess off the bottom brim part to exactly match the top part and then smooth and treat the edge.


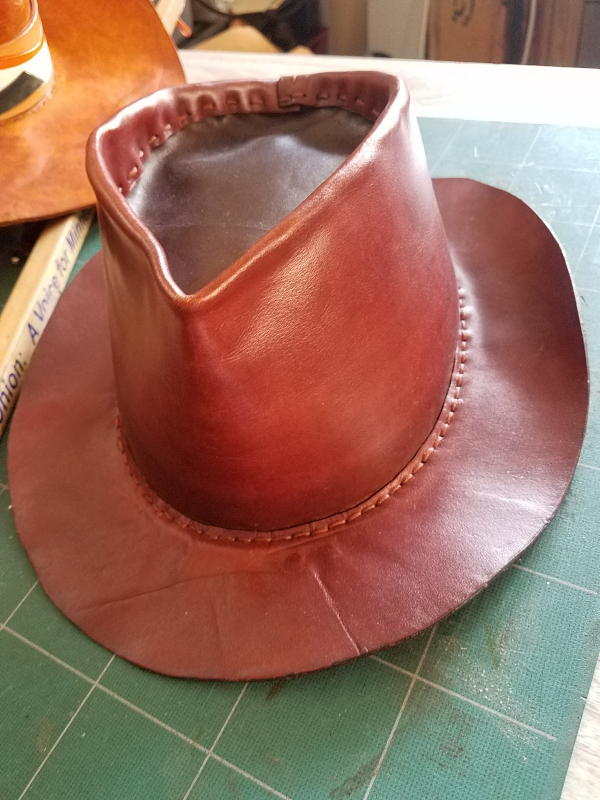
If you make the brim of the Hombre cowbay hat narrower, you get a nice Fedora style hat.

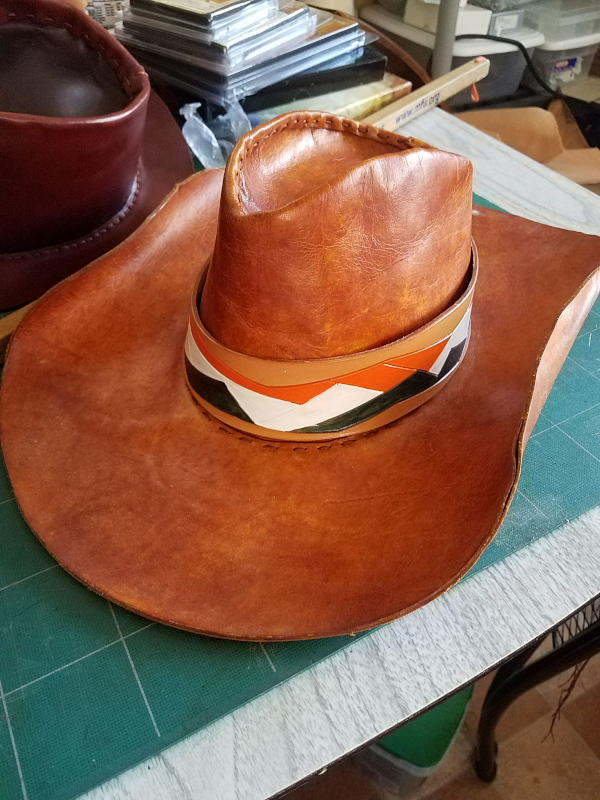
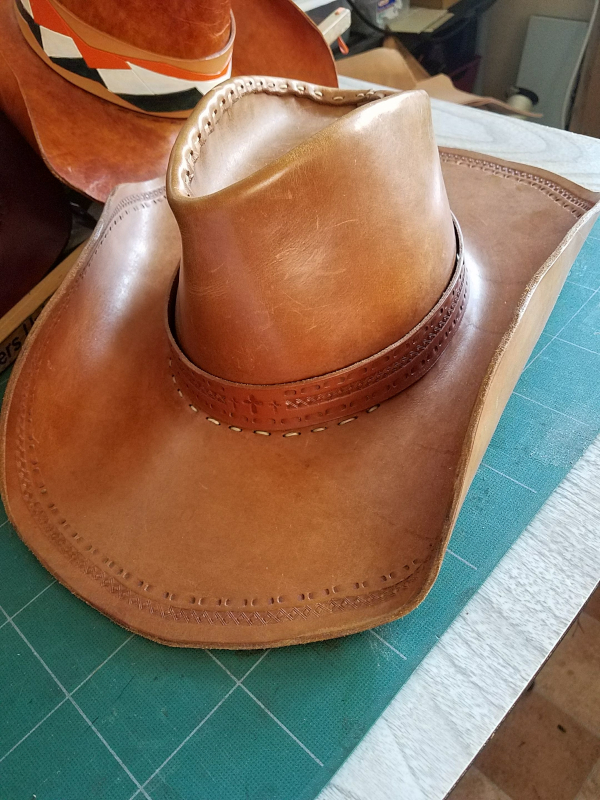
My second cowboy hat was done in 2-3oz leather and still keeps its shape nicely.


My first Hombre cowboy hat - made from 5-6oz leather - too heavy, but it sits so comfortably that I don't feel the bit of extra weight.


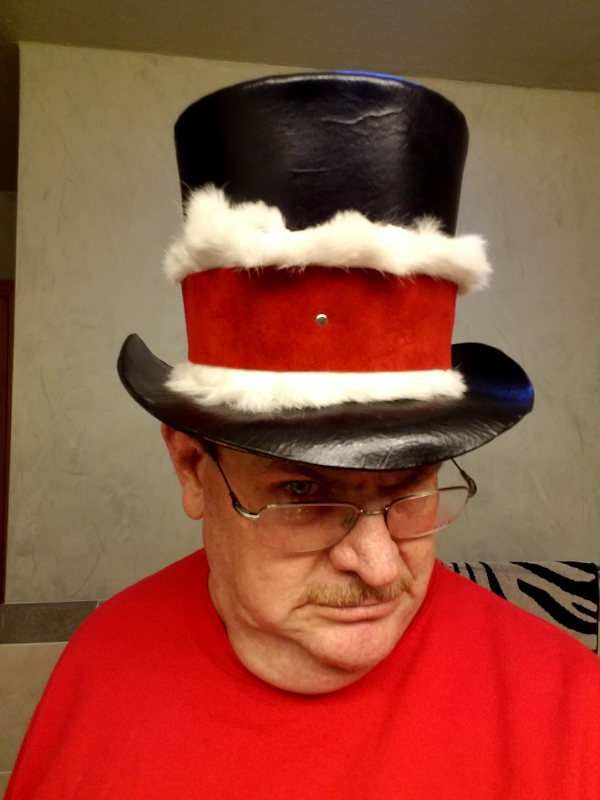
I made the bowl part of this top hat longer and with interchangeable hatbands it becomes a Christmas hat!


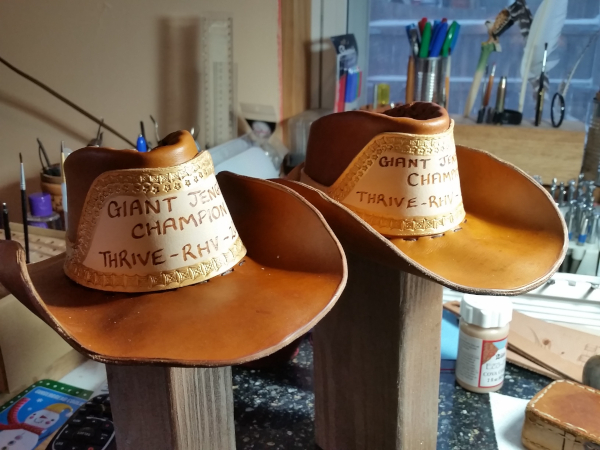
Two half size cowboy hats that were given as novelty trophies at a men's retreat.


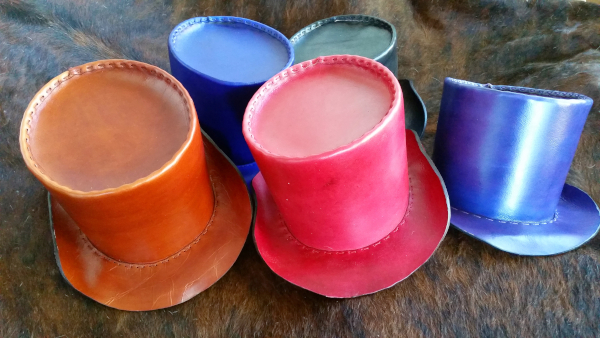
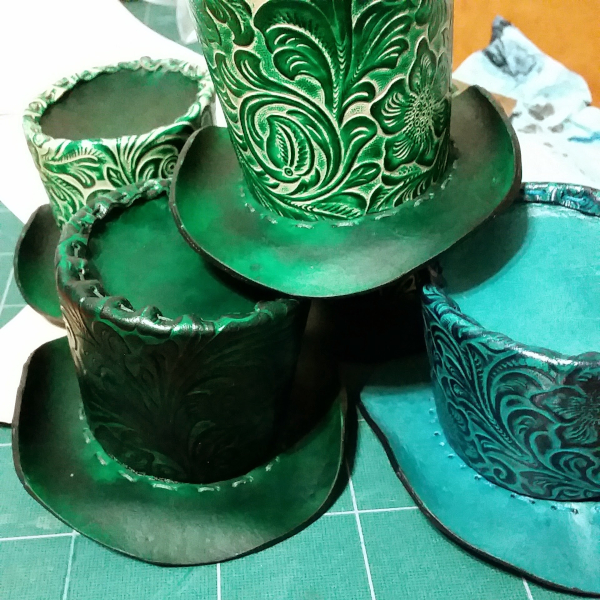
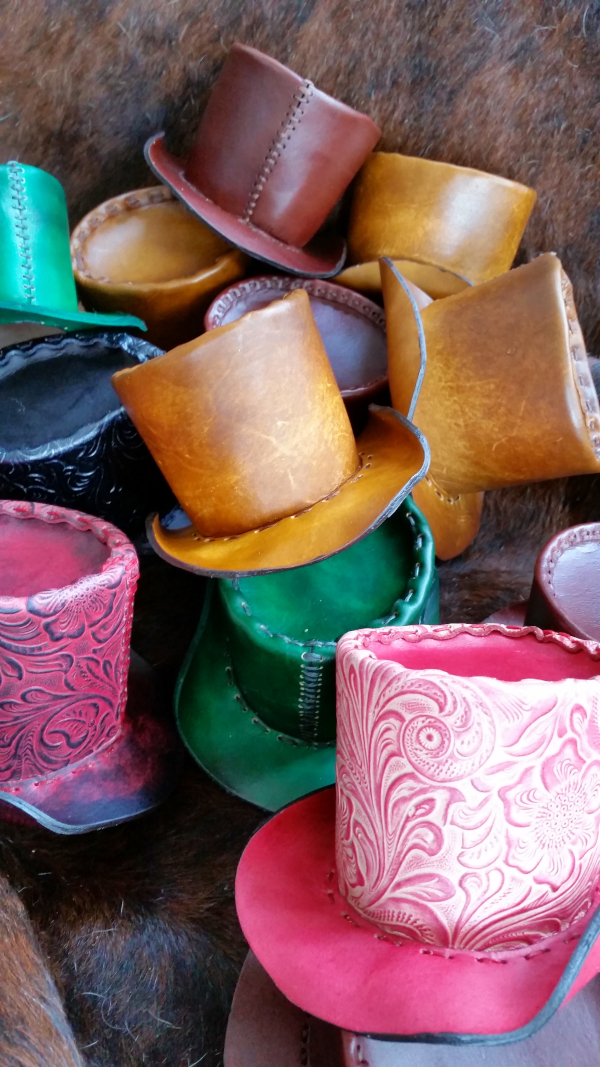
A whole bunch of half size hats I made for someone to sell at an Irish Fair.  For some bowls I used pre-tooled leather that I just had to dye.


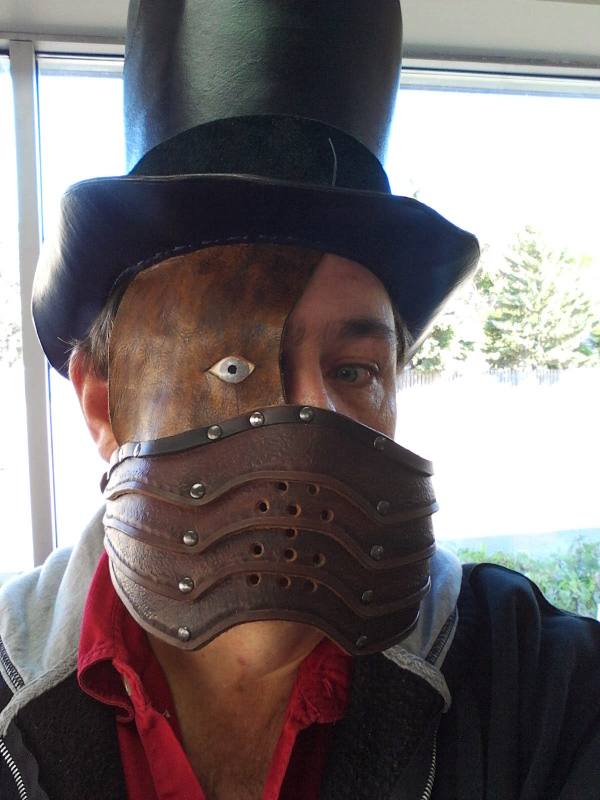
When sewing the brim to the bowl, I sewed in a mask I made, to make a bad-ass haloween outfit.  (The eye is made of leather as well.)


Have fun!!


[Updated April 28, 2020]

Saturday, May 23, 2009

Top Hat 1

I have made many of these hats, some full size and some half-size.
Links to download the half size tophat patterns are at the bottom of this post.
The patterns for the full size hats, in four styles, can be found at 

You have to transfer the patterns to the leather very carefully and accurately. 
The advantage of these patterns, is that the stitching holes are pre-indicated on the patterns, which makes the hats very easy to put together!

To know what size to make the hat, cut one of the brims out of cardboard and fit that on your head.  It should just sit comfortable.

 I first trace them onto tracing film with a very thin sharpie - make sure you get the exact position for all the holes. If you get the holes accurately on the leather, the hat practically builds itself.
I dampen the leather with water and then trace the hat parts down onto the leather from the tracing film.

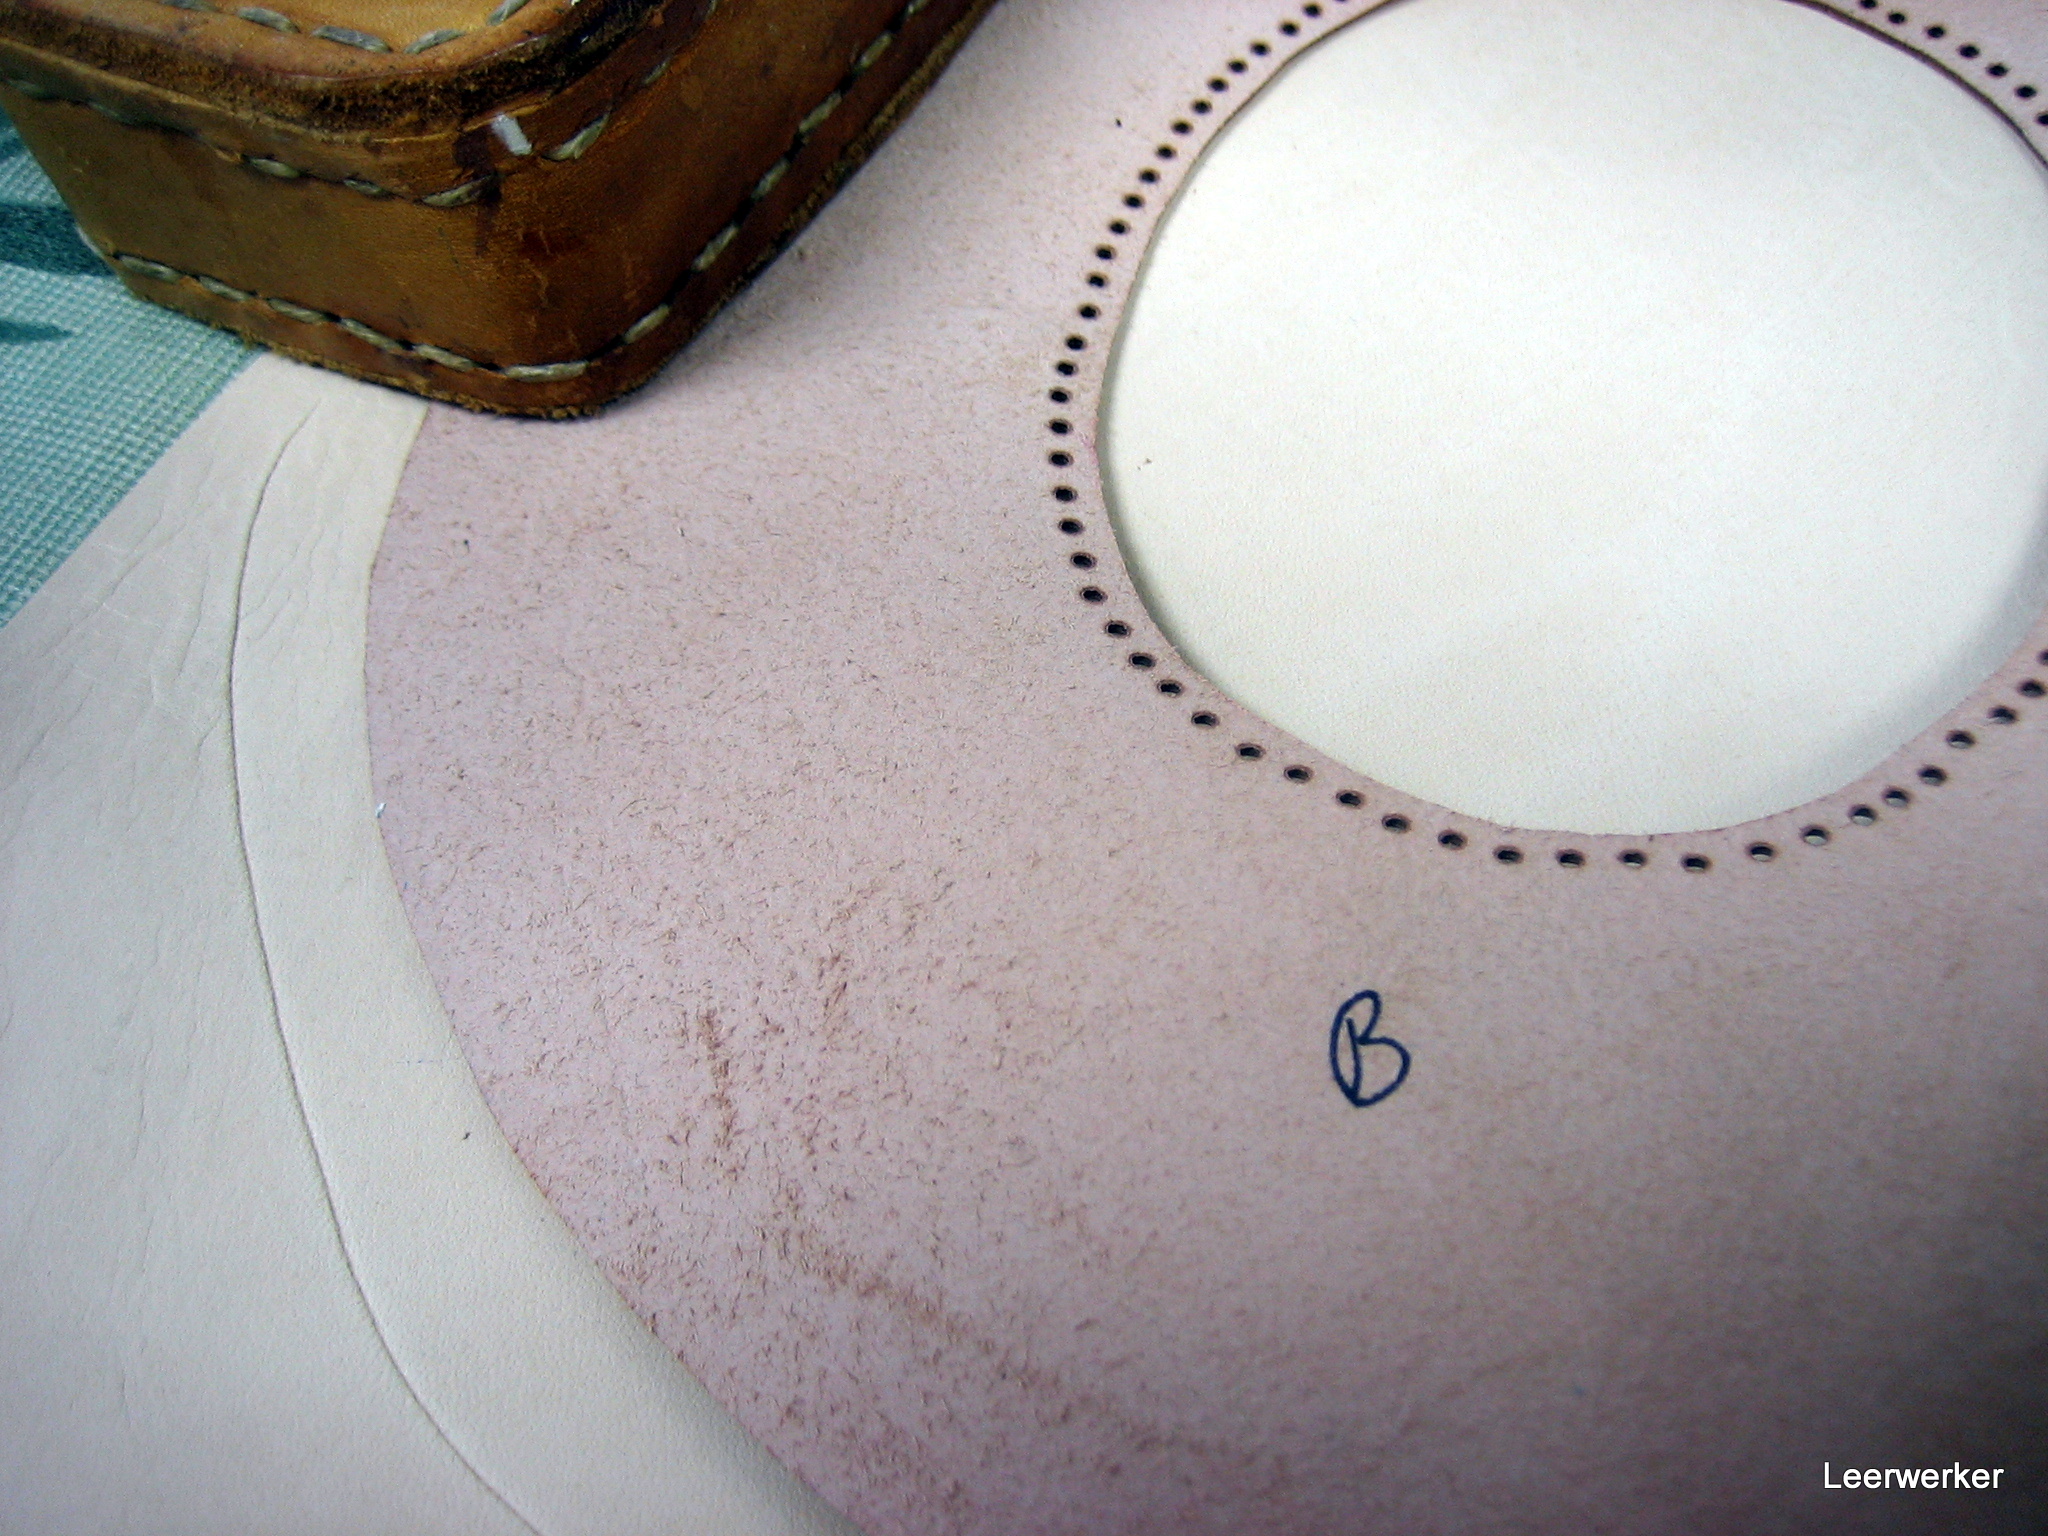
Cut one brim out exactly and punch the holes. That is the brim that you see here lying flesh side up on the large piece of leather from which the second brim will be cut (the brim consist of two layers that are eventually glued together. So you can go as thin as 3oz leather for the brim pieces.
The first piece is placed upside down on the bigger sheet of leather so that they touch grain-side-to-grain-side. The inner circle and stitch holes are marked with great accuracy. The outer edge of the bottom piece is just marked larger on the outside and cut roughly - much bigger than the rim of the first piece. This will allow for curling up the brim into a snazzy shape later!
[Note the little "B": I was cutting more than one little hat at the same time and because I am using one piece as the template for the second, they become partners that have to stay together - they should be a perfect fit ... ]

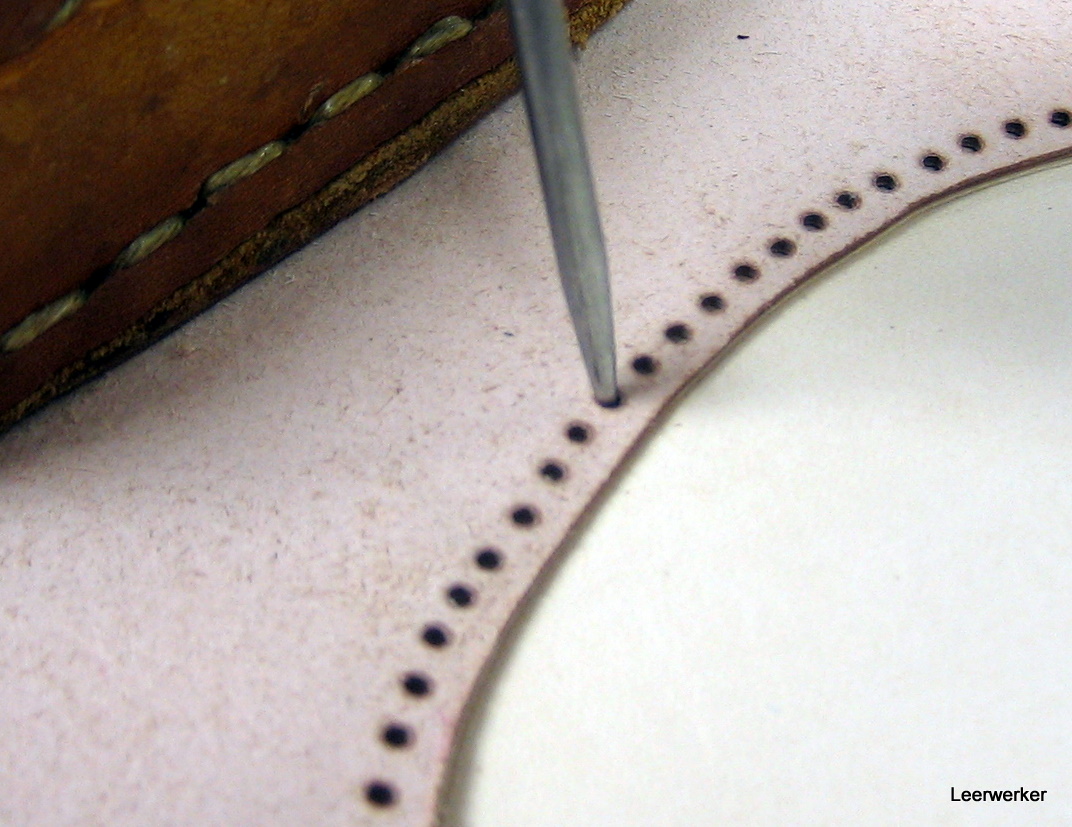
This photo shows the stitching holes on the second brim being marked with a scratch awl:


As a second step, I cut the pieces out of the leather and punch all the stitching holes that have not been punched yet. I do this now so that when I dye the pieces, the insides of the stitching holes are also dyed and do not show up light against a dark dye job.


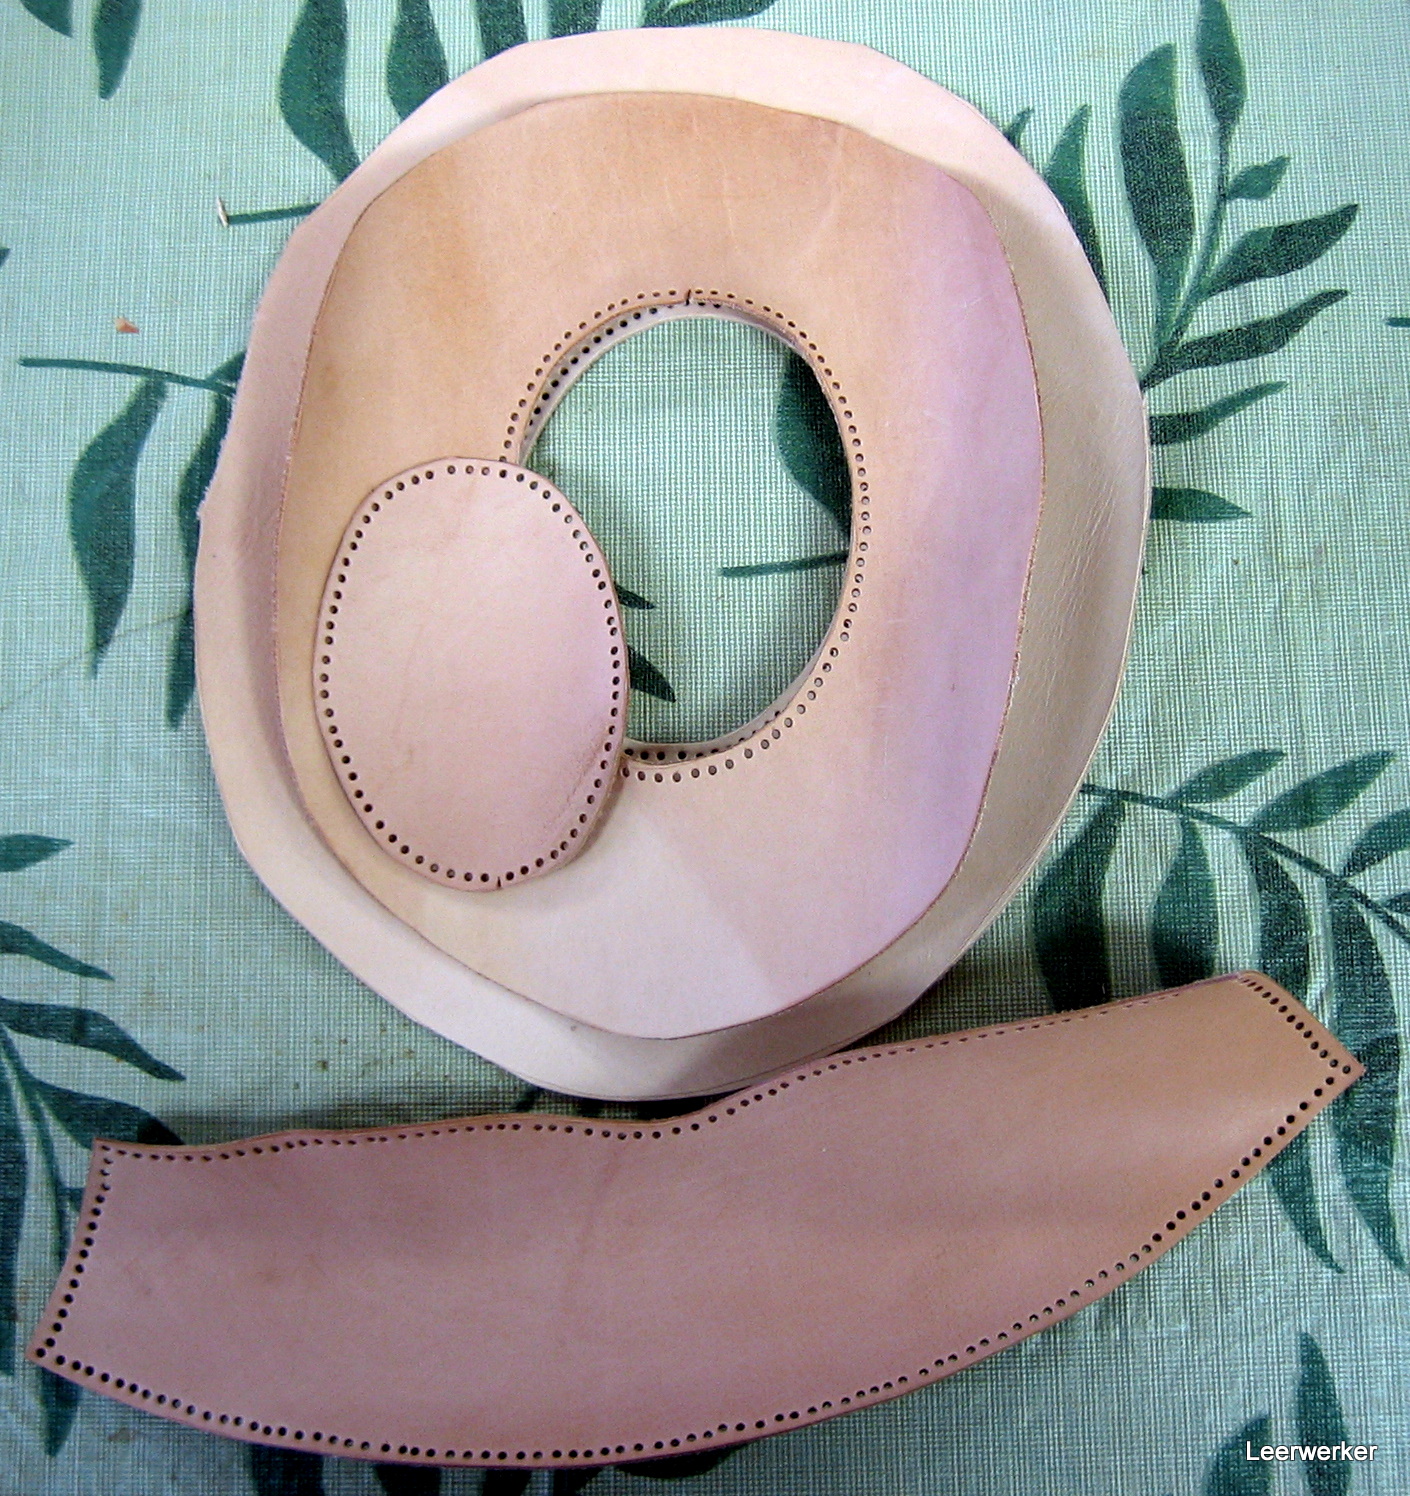
All the pieces have now been cut and punched: a top and bottom piece for the rim, and the long piece for the bowl and the small round top part of the bowl.

The third step is to dye the leather the color of your choice. 
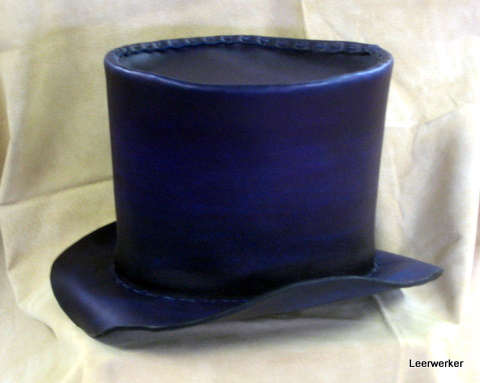
 For the two hats you see on this page, I did the following: the big hat (with curled brim) was first dyed with a dauber and full strength Eco-Flow blue dye - really saturated so that I got it as dark blue as possible. 
 Then I took a rag around my finger, dipped it in Eco-Flow dark mahogany and rubbed the pieces all over to get as close to black as possible. I was careful not to saturate the leather with the mahogany - I wanted a dark "two-tone" effect.

The small hat (with the flat brim) was first dyed with the purple Eco-Flow dye and then rubbed over with timber brown.


CONSTRUCTION

Once the dye is dry, you can start sewing the hat together. I do not use any glue on the seams - the hat is three dimensional and has to take shape as you sew it. It would be just too difficult to glue the pieces in place before sewing.
Take Care: Do not put any dressing or conditioner on the leather before construction is complete - it helps to get the leather damp as it forms itself into the shape of a hat...


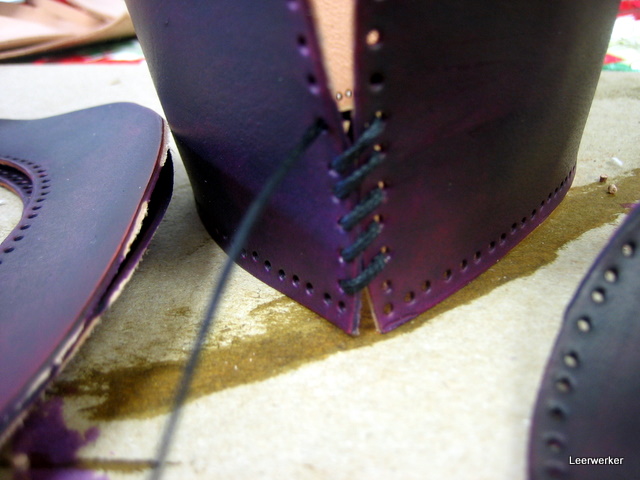
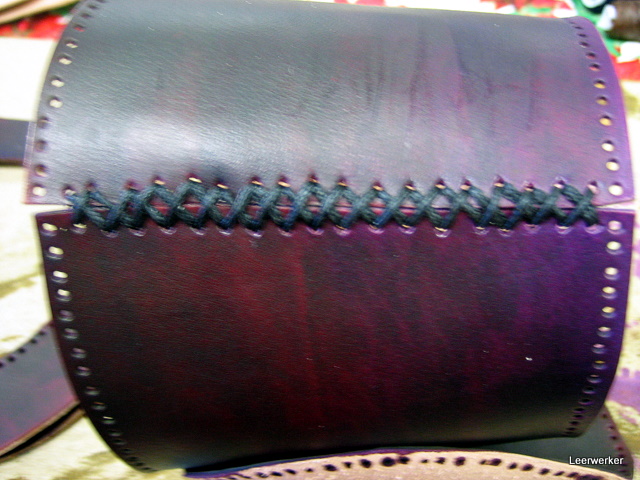
The first seam to be stitched is the one at the back of the bowl to form the circular "tube" of the bowl. This is just a simple stitch where the threads cross on the front of the leather.
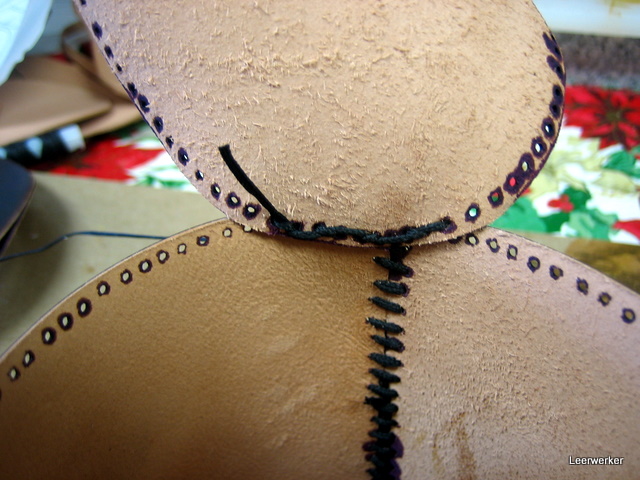
On the back (inside the bowl) the stitches go straight across to the corresponding hole - with the two edges of the leather overlapping all along the edge.
Take NOTE: in these photos the seam is done with the two pieces of leather butting up to each other, but it works better with the two edges overlapping.

.On the photo above I have just started and going up with one half of the stitch - then I will come down with the visible threads crossing those that are there already to form an X:

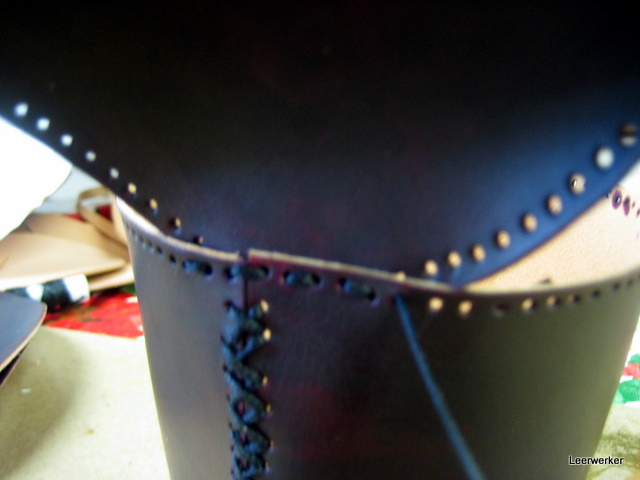
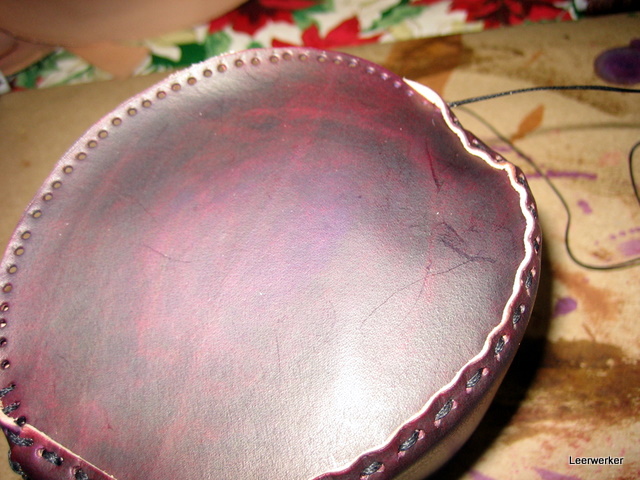
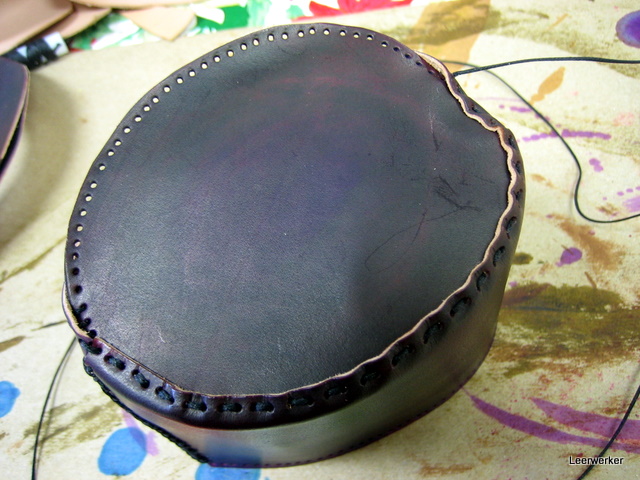
The next step is to sew the crown (very top part) to the bowl of the hat.  The pattern of this top circle of leather has a small notch on one side.  This notch is aligned with the seam of the already sewn piece.
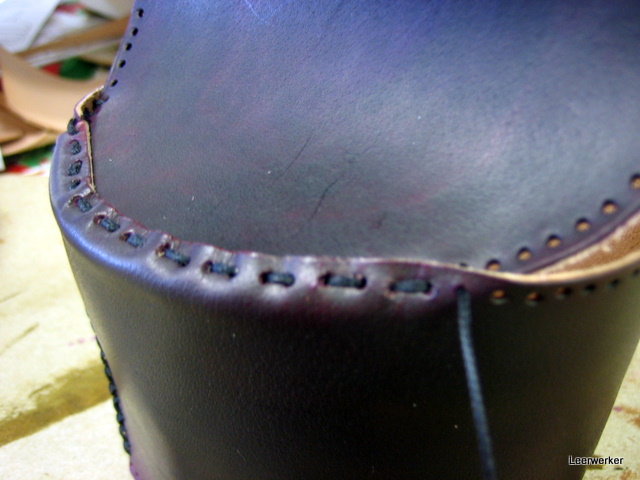
I just use a very simple running stitch for all the rest of the sewing.  Starting with this seam round the top of the hat, the hat is starting to shape itself in three dimensions and the leather will become distorted.

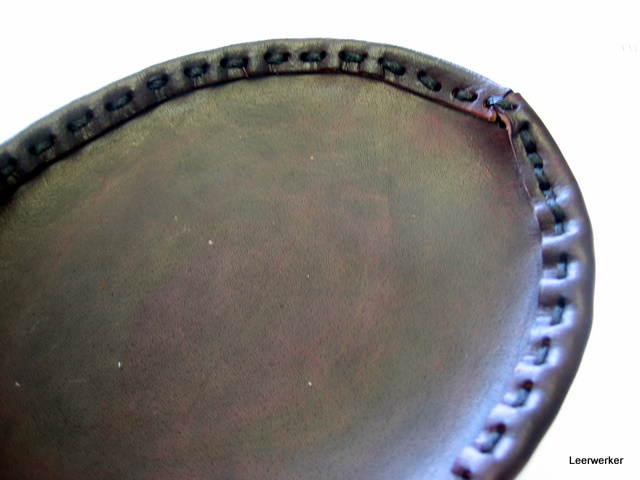
Take careful note of the positioning of the leather here - the crown has its grain side to the inside flesh side of the bowl.


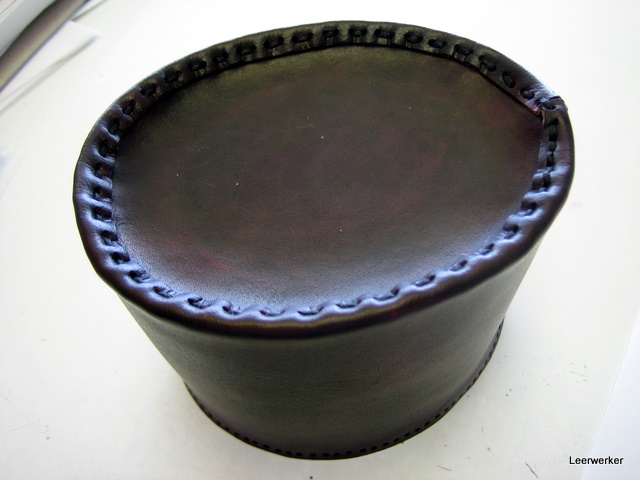
I keep the crown of the hat (flat round very top piece) dry and stiff, so that it retains its shape.  I dampen the top rim of the bowl while I stitch so that it can start to fold over as you can see in these images.
This makes it much easier to shape the bowl when this part of the sewing is done.
Make sure you do not miss any of the holes for the stitching - these are well planned and the bowl will distort if you get the holes out of alignment.


And that is where you should be now - with the crown now part of the bowl and the top of the sidewalls folded over.  The edges of the crown piece can also be folded a bit up, especially in the full size hats.


I am going to continue this instruction set in a second blog post called Top Hat 2, just to keep it manageable in size. 

You can download two .pdf files here for the half sized tophats - apology for the two filenames being slightly misleading:
(The pattern of the sidewall of the bowl is meant to print on legal size paper.)
Tophat Bowl
Tophat Brim