Wednesday, May 1, 2013

Starting a 4 strand braid

Got a new camera to do POV videos with and I have a lot to learn!

Here is the first one - starting a four strand round braid with one color and no core.

Don't despair if you drop your strands and everything looks confusing (I usually keep a bull clip handy to keep the loose strands in place if I have to take a break):


And here is the same thing, but with a core.  I use artificial sinew for the core.  It is waxed and therefor sticky, so the braiding sticks to it and keeps snug all the time.

I know it makes for a lot of repetition, but that is a good thing.  All aspect in braiding should be practiced over and over and over until you can do it while watching TV.

So, here - starting the same four strand braid, but using two colors.

The first method will give you a spiral pattern around the braid:


And if you start it this way, you will end up with a diamond pattern running up the length of the braided cord:


Tuesday, February 12, 2013

Resist and Hi-Lite

At our guild meeting in February we had demos on two tone dying.
One method that works really well on pre-embassed belts, is the same block dyeing that the hippies did in the sixties!
It starts with a belt that was dyed with Pro Waterstain in the bordeaux color (let it dry well for a few hours):
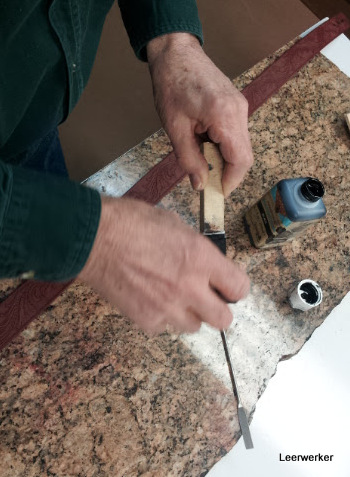
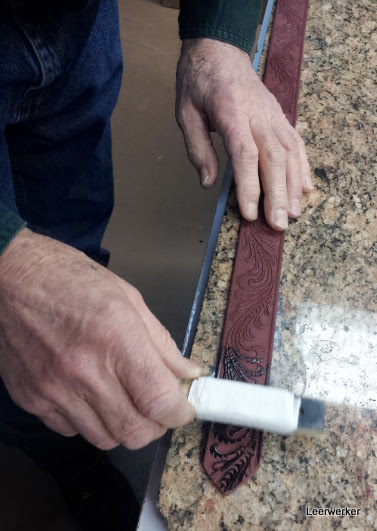
Next a small sponge is used to apply a darker or lighter stain to cloth that is wound tight around a flat piece of wood.
This is wiped lightly across the embossed leather so that just the tops of the tooled designs catch the dye.
The result is really great.  But, like all dyes, it looks fairly dull untill a finish is applied; and here you can see the difference:
Here are more examples Larry did last year:
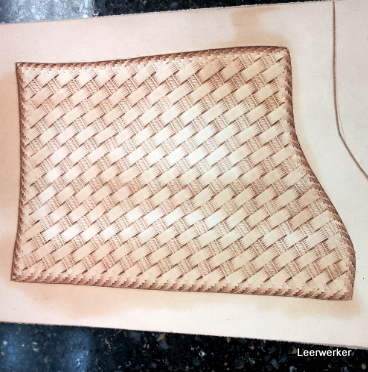
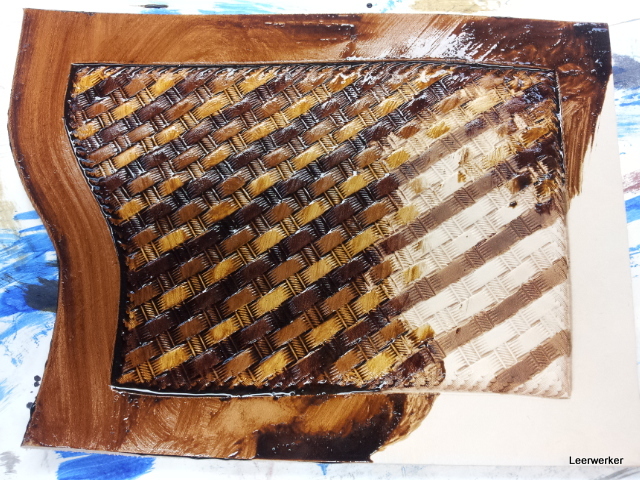
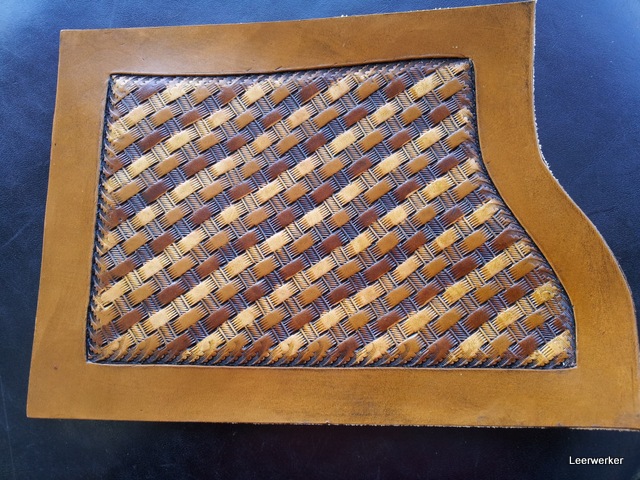
The other method we explored was resisting parts of a project.   This one started with a simple basket weave - you can use this on floral carving or any tooling you have.
Next you paint one row of the basket weave with super sheen and one row with a brown dye and let it dry well.  It will not look too defined at this point unless you are super anal and sit for hours with a very thin paint brush.
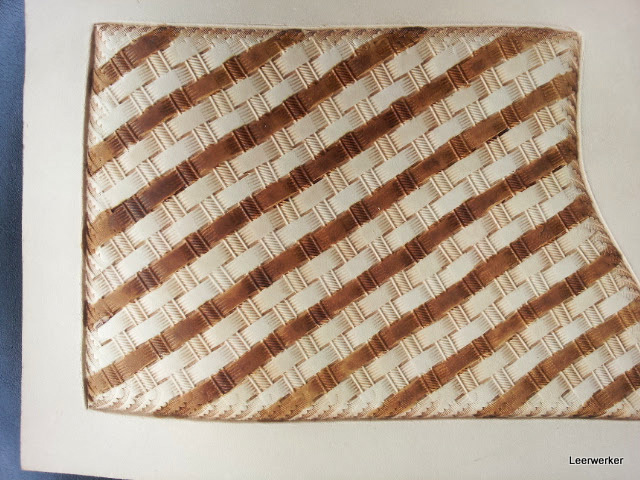
Then you follow the Mr Miyagi instructions for applying Chestnut Hi-Lite stain:  Wipe on - wipe off.
And the magic happens:
The other half of this piece of leather also got basketweaved, and the whole process was the same, except Tan Antique Gel was used in stead of Hi-Lite stain.
Close up:
I like the Hi-Lite more than the antique gel for this particular effect.
So one step further!  Add one more different line to the basket weaving - black dye.  So the four different rows you see here is: not treated / resisted with super sheen / dyed with timber brown dye / dyed with coal black dye.
And after applying the chestnut tan Hi-lite stain, the result is even better than I expected!
There is an older post on the leatherlearn blog about resisting as well:  just search for "resist".

Thursday, December 22, 2011

Strap Cutter


Here is a neat trick shown to me by Larry Moskiewicz.  

The purpose is to make sure that the wooden strap cutter does not wander off too easily when you cut straps for horse tack or belts or any other strapping. 

By gluing a 1/4" wide strip of cardboard into the tool, the bar holding the blade is swung slightly, which gives the blade a very slight angle to the cutting direction so that it ever so slightly forces the leather strap being cut, against the guide handle.


 I think the photos explain themselves well, but I will show you a close-up or two: Here you can see the edge of the piece of card board - it is just about 1/16" thick and 1/4" wide.  


 From another angle you can see the piece of cardboard just about showing behind the bar holding the blade.  

 The next photo shows the same angle, but the bar holding the blade has been drawn back into the handle to expose the piece of cardboard.  

 This small modification makes one of the simplest tools to use, even more effective than it already is.

Wednesday, November 16, 2011

Braiding a Foundation Knot


Thanks to my friend Mark Sampson, my capcam works excellent so that you can see on the videos exactly what I see! 
 

You will have to practice this knot quite a few times, one after the other, then go have coffee and come tie five more knots!
Once you know the "story" I teach you by heart, try to tie at least one knot a day for a week.   It will help a lot to be able to do these without referring to any reference material. 


(The whole channel can be seen by clicking on the little icon in the top right hand corner:)


After tying the knot, you can roll it the same way you roll a round braid between two blocks of wood:


Updated 04/15/2021

Tuesday, May 10, 2011

Quick Effective Belt


Need a fast gift? 

This is a pre-embossed belt.  That's why I put it under small projects - there is very little work involved in making this belt.
I used water and spirit based dye to roughly add the red and green and purple to the belt design.  I worked fast to get a more organic look.  I did not want a detailed dye job.

So after that was done the belt did not look so hot at all.    

Then I sprayed the belt with two layers of Supersheen to create an even, partial resist and coated it with Chestnut Tan Hi-lite stain.   It outlined the tooling and gave the belt, even with the red and green, a very well made look!

Sunday, November 14, 2010

Neck Purses


With Christmas around the corner, you may want to make a few quick gifts for the young kids in your family:

A small coin pocket that hangs from a lace around the neck. 
Their shape is not very crucial, so you can just draw up your own pattern from looking at these pictures. Even the construction of these are not complicated, so just study the pictures and let me know if you have a question.

Thursday, November 11, 2010

New Take on Basketweave


Tom Evans of Boarshead came up with this idea and I will probably mostly do basketweave backgrounding like this!

This is a piece of leather stamped with the basket weave background and Block-out resist painted on every second line of stamping

After applying Dark Brown Antique Gel

This one was done by Tim:  On this piece only the 'tops' of the weave was coated with Block-out. You can still see some spots that have not dried completely.

Medium brown Hi-Lite Stain (Tandy Item #2608-03) made this design come alive.

Here is another one I tried - this time with Super Sheen and a mix of Briar Brown and Raisin Mahogany Eco-Flo Hi-Lite Stain.

This video shows the technique in action:


A newer video about using this technique:

In 2017 I did a Live Video Stream showing the same - it's a bit long because it was live, but could still be usefull!


Updated May 24th, 2020